Controlling the Vehicle
This section explains how to control the vehicle in-flight.
Last updated
This section explains how to control the vehicle in-flight.
Last updated
During operation, the vehicle can be commanded using the Fly and Flight Tools on the left side of the screen, as well as the Emergency Actions from the top menu bar.
It is recommended to practice the following commands in the several times before operating the vehicle.
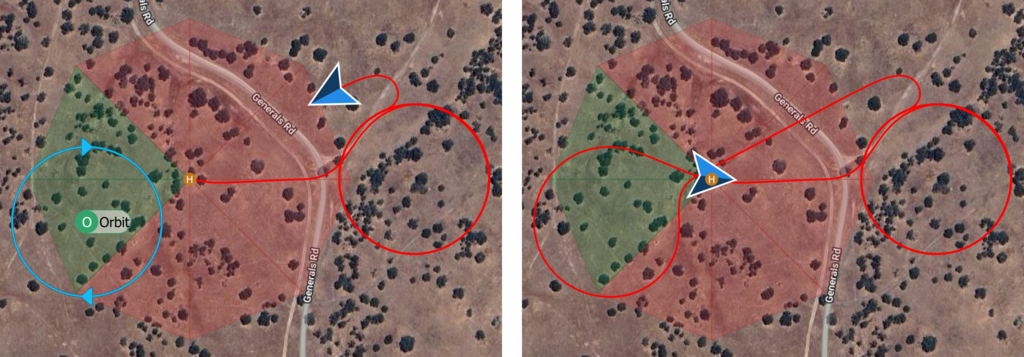
When the Return command is given, the vehicle will fly in a straight line to the selected approach sectors at its current altitude or ascend to the minimum set return altitude while en route.
The DeltaQuad Evo will place the loiter-down orbit within the selected sectors, descend to the set landing altitude, exit the orbit in the direction of the landing location, transition, and land in multirotor mode at the planned location.
This applies as well if a Return command is initiated by the failsafe system.
When executing a mission plan, if the Return command is given by the operator or initiated by the failsafe system, the DeltaQuad Evo will return in a straight line to the planned landing pattern at its current altitude or ascend to the set minimum return altitude while en route.
After reaching the Land altitude, the vehicle will fly in the planned direction toward the landing location, perform a back transition upon reaching the takeoff location, and land in multirotor mode. This is true whether an Orbit Land Pattern or a Straight Land Pattern has been planned.
In addition to the planned Landing Pattern, the operator can select available approach sectors in the octagon for landing during a Return command. When the Return command is initiated, the red octagon appears around the takeoff location.
If no sectors are selected, the vehicle will follow the planned Landing Pattern.
If at least one sector is selected and confirmed (green), the vehicle will place the loiter-down orbit within the selected sector(s), descend to the set Back Transition altitude, exit the loiter toward the landing location, perform a back transition upon reaching the takeoff location, and land in multirotor mode.
When using the approach sectors instead of the planned Landing Pattern, ensure the Approach Altitude is set 25 meters above the highest object in the landing area.
After a QuadChute event occurs, the following guidelines must be followed:
If the vehicle's altitude is below or at the height of obstacles, ascend to a safe altitude by pushing the left joystick forward on the handheld controller.
When a safe altitude is reached, change the vehicle's heading so that its nose faces into the wind by using the left joystick to turn it left or right.
The wind direction can be viewed in the Fly View on the Telemetry Dashboard, indicated by the arrow in the top left corner of the compass.
When the correct heading is reached, use the Transition Command from the Flight Tools menu on the left side of the screen.
After the vehicle has transitioned from multirotor mode to fixed-wing mode, return and land it by either using the planned Landing Pattern, if applicable, or the approach sectors in the Fly View. After the landing thoroughly check the vehicle for damage and fly-worthiness. When in doubt contact [email protected].
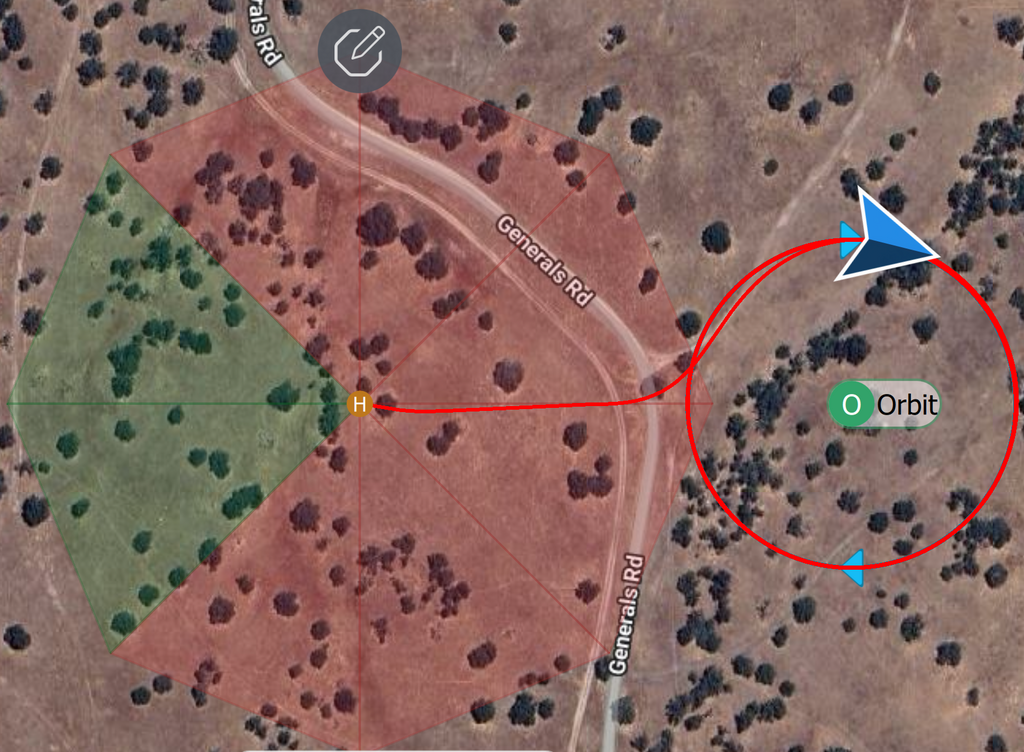
When the Hold command is issued, the vehicle will maintain its current position and altitude. In fixed-wing mode, it will circle the current location with a 100-meter radius.
Strong winds can push and distort the orbit in any direction. Therefore, when issuing the Hold command, it's crucial to ensure there is at least 200 meters of clear space in all directions.
In multirotor mode, the vehicle will hold its current position and altitude. Extra caution is required, as the DeltaQuad Evo's default maximum hover time is limited to 90 seconds. After the timeout, the vehicle will force land at its current location.
The Mission command becomes available once a mission plan is uploaded to the vehicle. After confirming the mission start, the vehicle will begin or resume the mission from the active waypoint (green). The active waypoint can be changed by clicking on the desired waypoint and confirming the new selection.
After selecting the new waypoint, Hold to Confirm and continue the mission from the selected waypoint.
If a mission plan includes a Landing Pattern, the vehicle will execute the mission and land at the designated location. When using Quick Takeoff, and if a mission plan is uploaded and executed, the vehicle will fly through the waypoints consecutively and orbit at the final waypoint until a new command is received.
Once the vehicle is in fixed-wing mode, the Orbit command can be issued. Click anywhere on the map to select the orbit location.
The green flight path toward the new orbit represents the vehicle's estimated trajectory.
If the new orbit is placed beyond the set Guided Maximum Distance, the following warning will appear.
The Guided Maximum Distance can be changed in AMC Menu -> Settings -> Fly View.
The orbit can be adjusted in location, altitude, direction, and size.
Click and hold the inner white vertex to move the orbit.
Click and hold the outer white vertex to adjust the orbit's radius by dragging it left or right (minimum radius is 100 meters, maximum radius is 2000 meters).
Click on the upper or lower green arrow to change the orbit's direction. By default, it rotates clockwise.
The orbit's altitude can be adjusted using the Altitude Slider on the right side of the screen.
The orbit's altitude is by default referenced to HGT (heights relative to the takeoff location). Special caution should be taken when operating in areas with varying ground elevations.
The altitude frame and the available range of the Altitude Slider can be changed in AMC Menu -> Settings -> Fly View.
Once the vehicle is in fixed-wing mode, the Fig 8 command can be issued. Click anywhere on the map to select the orbit location.
The green flight path toward the Fig 8 represents the vehicle's estimated trajectory.
If the Fig 8 is placed beyond the set Guided Maximum Distance, the following warning will appear.
The Guided Maximum Distance can be changed in AMC Menu -> Settings -> Fly View.
The Fig 8 can be adjusted in location, altitude, direction, and size.
Click and hold the inner white vertex to move the Fig 8.
Click and hold the outer white vertex to adjust the Fig 8’s size and orientation by dragging it in any direction.
Click on the upper or lower green arrow to change the Fig 8’s direction; by default, it rotates clockwise.
The Fig 8`s altitude can be adjusted using the Altitude Slider on the right side of the screen.
The Fig 8`s altitude is by default referenced to HGT (heights relative to the takeoff location). Special caution should be taken when operating in areas with varying ground elevations.
The altitude frame and the available range of the Altitude Slider can be changed in AMC Menu -> Settings -> Fly View.
The Change Speed Command adjusts the vehicle's airspeed and can be executed using the slider on the right side of the screen.
The maximum airspeed of the DeltaQuad Evo is 23 m/s. This airspeed applies during mission execution as well as during operations without a mission plan.
Airspeed refers to the speed of a UAV relative to the surrounding air. Ground speed is the speed of the UAV relative to the ground. Understanding both airspeed and ground speed is essential for effective navigation and flight planning, especially in varying weather conditions.
Changing the airspeed affects battery consumption, so the estimated flight time must be monitored carefully.
The vehicle will land at its current location. If it is in fixed-wing mode, it will first transition back to multirotor mode and then begin its descent until touchdown.
Do not issue the LANDING Command at high altitudes. The multirotor mode consumes up to 12 times more energy compared to the fixed-wing mode. First, reduce altitude in fixed-wing mode and issue the Land Command at 100 meters or below.
Please note that the maximum default hover time is 90 seconds. After the timeout, the vehicle will force-land at its current location.
The Transition Command toggles between the VTOL modes of the vehicle. When the vehicle is flying in fixed-wing mode, it switches to multirotor mode, and vice versa.
Areo - fixed-wing mode
Transition - transitioning from one VTOL mode to the other VTOL mode
Hover - multirotor mode
Before the Transition Command is issued, the vehicle must be aligned into the wind. At altitudes higher than 100m above ground, or in strong winds, it is not recommended to switch from fixed-wing to multi-rotor mode.
Important Items During a VTOL Mode Change:
Altitude and Positioning
Ensure the vehicle is at a safe altitude to transition modes without risk of collision or terrain interference.
Monitor the vehicle’s current position relative to obstacles.
Battery Level
Check the battery status to ensure there is sufficient power for the transition and subsequent flight.
Plan for a safe landing if battery levels are critically low.
Flight Mode Confirmation
Verify that the current mode (VTOL, fixed-wing, or multirotor) is correctly displayed in the control interface.
Ensure the Transition Command is initiated correctly.
Environmental Conditions
Assess wind conditions and weather factors that could affect stability during the transition.
Be aware of any potential changes in the environment that could influence flight performance.
Post-Transition Monitoring
Continuously monitor the vehicle’s performance after the mode change, including responsiveness and stability.
Check telemetry data for any anomalies immediately following the transition.
LANDING will land the vehicle immediately at its current location. When the vehicle is in fixed-wing mode, it will first transition to multirotor mode and start its descent.
Do not issue the LANDING Command at high altitudes. The multirotor mode consumes up to 12 times more energy compared to the fixed-wing mode. First, reduce altitude in fixed-wing mode and issue the LANDING Command at 100 meters or below.
Please note that the maximum default hover time is 90 seconds. After the timeout, the vehicle will force-land at its current location.
SHUTDOWN will stop all motors IMMEDIATELY. This procedure should only be used while the vehicle is on the ground or as a last resort to avoid damage to people or property.
Using this function during flight will crash your vehicle and void your warranty.
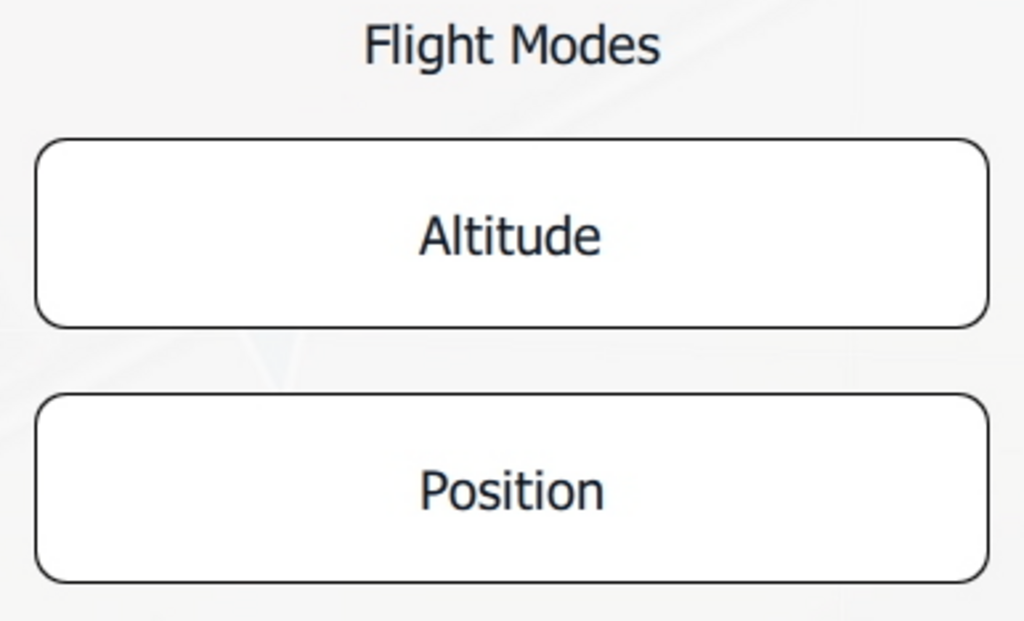
The MODE Indicator displays the current flight mode (VTOL Takeoff, Hold, Altitude, Position, Return, Land, Mission). Select to enable Altitude or Position mode.
Always set the Return to Launch altitude (HGT) higher than any obstacles in the mission area, such as trees or man-made structures. The Return to Launch altitude (HGT) is referenced to the takeoff location. For more information, please review the Safety Features .
The available sectors and the Back Transition altitude can be modified mid-flight by clicking on the Pen Tool at the top of the octagon. For more information, please read .
Return can be stopped by using the Command.
Always set the Return to Launch altitude (HGT) higher than any obstacles in the mission area, such as trees or man-made structures. The Return to Launch altitude (HGT) is referenced to the takeoff location. For more information, please review the Safety Features .
When executing a mission, using Return should be a last resort. The recommended method for returning the vehicle in fixed-wing mode during a mission is detailed in the section .
Return can be stopped by using the Command.
Switch the Flight Mode to Position using the mode selector in the .
If the transition from multirotor mode to fixed-wing mode fails, land the vehicle immediately in a suited location by issuing the Land Command. During landing, the vehicle can be repositioned using the function on the handheld controller.
If more vertical control is needed, the vehicle can be landed manually in Position or Altitude mode. Please note that the maximum default hover time is 90 seconds. After the timeout, the vehicle will force-land at its current location. For more information, please read .
Before issuing a Hold command, the operator must verify the . When disabled, if the vehicle loses connection to the GCS after the Hold command is issued, the operator will be unable to issue any new commands. The vehicle will continue to deplete the battery until the is triggered, resulting in either a Return or Land command. Therefore, it is recommended to set the Data Link Loss Failsafe Trigger Action to Return mode.
To access the Orbit command, the Flight Tools must be enabled in the lower-left corner of the screen .
To access the Fig 8 command, the Flight Tools must be enabled in the lower-left corner of the screen .
To access the Change Speed command, the Flight Tools must be enabled in the lower-left corner of the screen .
To access the Land command, AMC must run in , and the Flight Tools must be enabled in the lower-left corner of the screen .
During the landing descent, the vehicle can be repositioned using the functionality.
The landing process can be stopped by using the Command.
To access the Transition command, AMC must run in , the Flight Tools must be enabled in the lower-left corner of the screen .
The active VTOL mode is displayed in the Vehicle Status Indicator on the left side of .
The Emergency Actions are accessible via .
During the landing descent, the vehicle can be repositioned using the functionality.
The landing process can be stopped by using the Command.
Switching Flight Modes will not require slider confirmation. When a new flight mode is selected this will be activated immediately. For more information, please read .