# GPS-Denied Operations
## Preparations
* Thoroughly review the chapter on [**Manual Control**](https://docs.deltaquad.com/tac/flight/executing-and-monitoring-a-mission/manual-control).
* A good knowledge of the mission area is required to fly in **GPS-denied** areas, as the vehicle’s position will be estimated based on **visual identification** of landmarks and other prominent features.
{% hint style="danger" %}
To navigate in GPS-denied areas, the use of an ISR payload is mandatory, as it enables visual identification of landmarks. Refer to the dedicated payload manual for proper use and handling of [**ISR cameras**](https://docs.deltaquad.com/tac/deltaquad-evo-payloads/nextvision-isr-payloads).
{% endhint %}
* The takeoff and landing area should have **sufficient space** with as few obstacles as possible.
* Power up the DeltaQuad Evo and the GCS (AMC).
* Set AMC to [**Advanced Mode**](https://docs.deltaquad.com/tac/flight/auterion-mission-control-amc-overview/normal-and-advanced-mode).
* Complete the [**Pre-flight Checklist**](https://docs.deltaquad.com/tac/flight/pre-flight-checks).
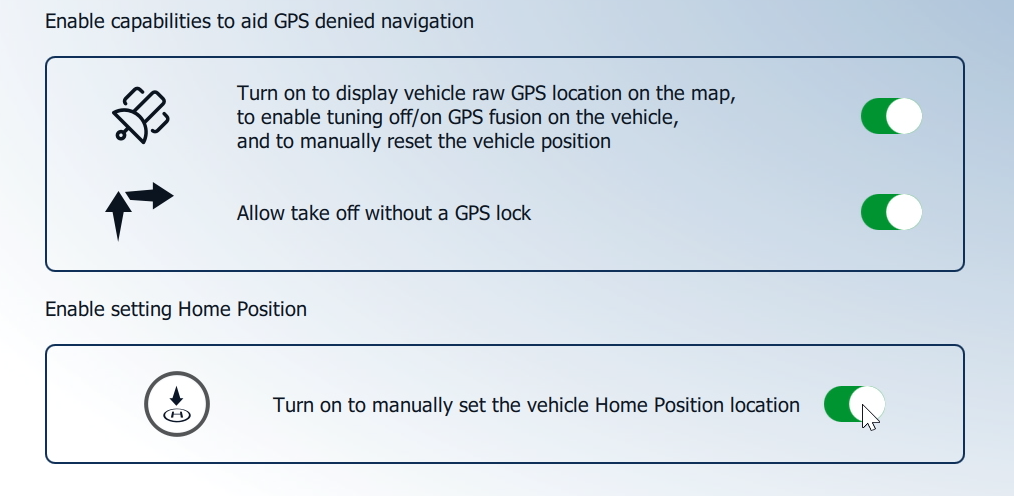
* The functions to disable **GPS Fusion**, set the **Home Position** manually, and allow **takeoff without GPS** lock, must be enabled in **AMC Menu -> Vehicle Overview -> More -> GPS Advanced Settings**.
## Disable GPS Fusion
{% hint style="info" %}
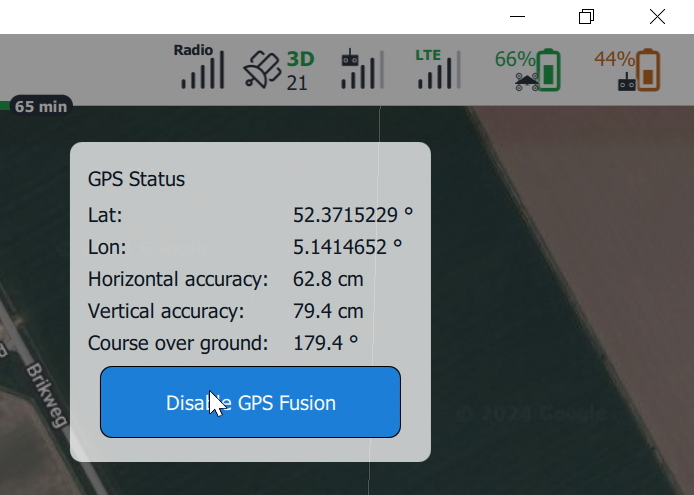
**GPS Fusion** - GPS data is combined with other sensor data to enhance the accuracy and reliability of the drone's navigation and positioning systems. When GPS Fusion is disabled, the vehicle position based on the raw GPS data will be displayed as a **grey arrow** in AMC. The **blue arrow** shows the estimated vehicle position based on the IMU, compass, and wind speed sensor.
If no GPS signal is available, only the blue arrow will be displayed.
{% endhint %}
When operating in GPS-denied areas, it is recommended to disable GPS Fusion before takeoff.
* Click the GPS icon in the menu bar and **Disable GPS Fusion**.
* Once disabled, the GPS symbol in [**AMC's Top Bar**](https://docs.deltaquad.com/tac/flight/auterion-mission-control-amc-overview/amc-top-bar) will turn red.
## Set Home Position Manually
* If a GPS signal is available during the start-up of the vehicle, the DeltaQuad Evo will set the Home Position **automatically** before disabling GPS Fusion. If no GPS signal is available, the Home Position must be set **manually**. When the function to set the Home Point manually is enabled, simply click on the waypoint displaying an **H (Home Point)**. The option will be provided to set a new Home Point.
* If **GPS spoofing** is prominent at the mission site, the raw GPS data will be false and therefore unusable. If the vehicle sets the Home Position automatically, it is recommended to reference the Home Point against the vehicle’s actual location before taking off. If the Home Position set by the system does not align with reality, set the Home Position manually as described above.
## Takeoff and Transition
#### Quick Takeoff
The DeltaQuad Evo is equipped with an **optical flow sensor**. A [**Quick Takeoff**](#quick-takeoff) can be used to take off and transition autonomously. The optical flow sensor will work up to 10 meters. The transition altitude can be set to 15 meters. In strong winds, drift can be expected for the last 5 meters.
#### Manual Takeoff
If a Quick Takeoff is not preferred, follow these steps for a **manual takeoff**.
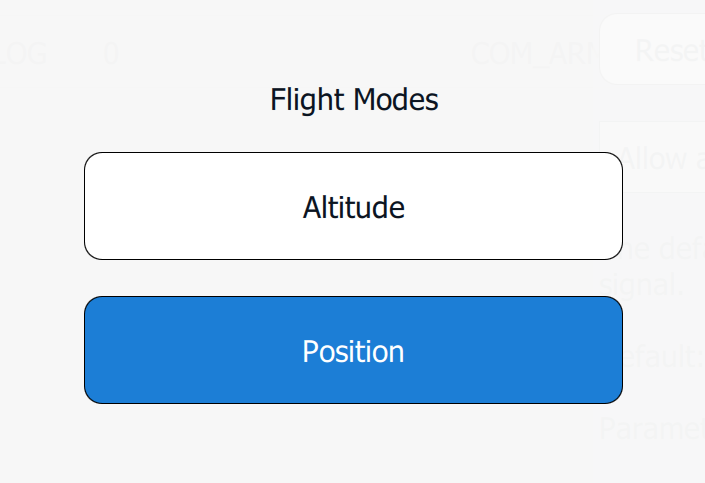
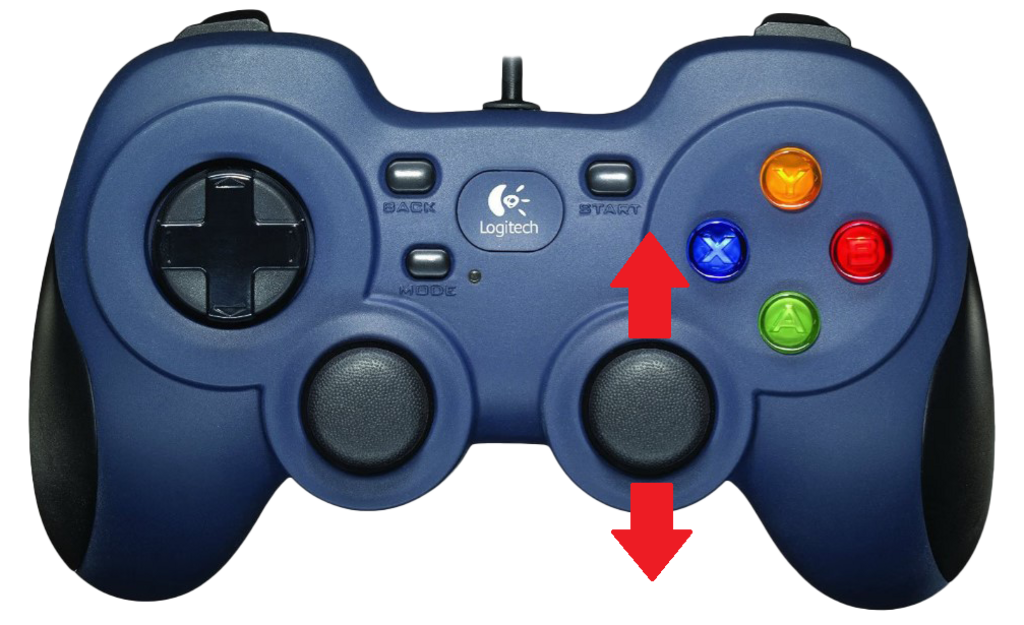
* Select Position Mode via the **Mode** button.
* **Position** mode must be selected for the optical flow sensor to work. The sensor is not available in **Altitude** mode and will function up to 10 meters above ground level. When the vehicle is higher than 10 meters, it will automatically switch to Altitude mode.
{% hint style="info" %}
**Optical flow sensors** provide real-time information about the drone's movement relative to the ground, enabling precise control and stabilization even in challenging environments where GPS signals may be unreliable or unavailable.
{% endhint %}
{% hint style="warning" %}
While optical flow sensors are versatile and effective in many scenarios, they may not provide reliable navigation or stabilization on surfaces where challenges are present, such as **plain** and **featureless** surfaces, highly **reflective** or **transparent** surfaces, **moving surfaces**, extreme **lighting conditions**, and **irregular** or **unpredictable textures**. In such cases, drones may rely on alternative sensors or navigation methods, such as GPS (if available), and IMUs to maintain stability and control.
{% endhint %}
\
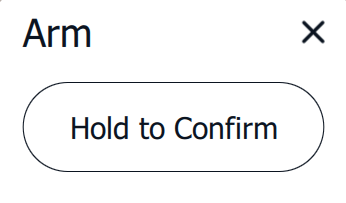
If **Allow takeoff without GPS lock** is enabled, manually arming the vehicle is available and the [**Vehicle Status Indicator**](https://docs.deltaquad.com/tac/flight/auterion-mission-control-amc-overview/amc-top-bar) reads **Ready to Fly**.
* Press **Disarmed** at the top of the menu bar.
* **Arm** the vehicle by pressing and holding the confirmation button.
{% hint style="success" %}
Manual arming is only possible in [**Advanced Mode**](https://docs.deltaquad.com/tac/flight/auterion-mission-control-amc-overview/normal-and-advanced-mode).
{% endhint %}
***
{% hint style="danger" %}
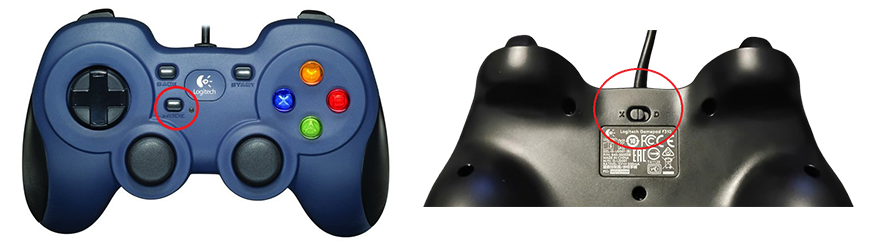
Before takeoff, ensure the Mode button is **not active** (no red light). The slider on the back of the controller must be in the default **‘X’ position** for the gimbals to function.
{% endhint %}
***
* The VTOL motors will spin up. In **multirotor** mode, the left control stick manages the throttle, regulating the drone's altitude.
* Press the left stick upwards to ascend.
* Continue the ascent. At approximately **10 meters** altitude, the vehicle will switch to **Altitude** Mode, and the optical flow sensor will no longer be available. The vehicle may start to drift.
* Correct the drift with stick input. The right joystick controls the position of the vehicle. Moving this joystick forward, backward, left, or right changes the vehicle's position relative to its current heading.
* The left joystick controls the vehicle's altitude and heading. Moving the joystick up will increase the altitude while moving it down will decrease the altitude. Moving the joystick left or right changes the vehicle's heading (yaw).
* When a safe transition altitude is reached, transition to **fixed-wing** mode.
{% hint style="warning" %}
A safe transition altitude should be higher than any nearby object, specifically **15 meters** above the highest obstacle in the takeoff area. The transition should be performed into the wind. Use the left stick for yaw control to point the vehicle’s nose into the wind.
{% endhint %}
## Fixed-wing Mode
* After the vehicle has transitioned to fixed-wing mode, continue ascending to a safe altitude. Moving the right joystick forward and backward controls the vehicle's altitude. Pull the right joystick backward to increase altitude.
* Stay close to reset the vehicle's position based on a nearby landmark, such as a tall tree or something similar.
* Or reset the vehicle position based on the camera’s center field of view.
{% embed url="" %}
* As soon as the vehicle's position has been reset with the **Set Position** feature, it will switch from **Altitude** to **Position** mode.
* The vehicle uses inertial navigation with sensors to track the drone's motion and orientation by measuring its acceleration and rotation.
* When using inertial navigation, several factors such as wind gusts, turbulence, and magnetic interference can affect the drone's motion and introduce errors in the inertial navigation system.
* Consider flying at a higher altitude, as altitude readings depend solely on barometer readings.
* Once the vehicle is in **Position** mode, a **Return** command can be initiated. Depending on wind speeds, direction, and gusts, the accuracy of the Return can vary significantly.
## Landing
* Bring the DeltaQuad Evo back toward the **Home Point** and align the vehicle with its nose into the wind.
* When above the landing site press **Land**.
* The DeltaQuad Evo will do a back transition, overshoot, and initiate the landing.
As soon as the **Land** command has been given, the vehicle will lose its position estimate and go into **Land Descent** mode.
* The vehicle will drift with the wind, the operator needs to [nudge](https://docs.deltaquad.com/tac/executing-and-monitoring-a-mission/manual-control#nudging)!
* The **optical flow** sensor will work as soon as the vehicle is 10 meters above ground.
* The DeltaQuad Evo will switch to **Position** Mode.
* When the optical flow sensor is working, let the landing process happen. **Do not interfere!**