Loading...
Loading...
Loading...
Loading...
Loading...
Loading...
Loading...
Loading...
Loading...
This section describes how to connect a second screen to the GCS.
The second screen function streams the video feed to a local device via an RTSP-based video stream from the GCS.
The second screen connects to the GCS, not directly to the UAV, to avoid doubling the UAV's bandwidth usage.
The video feed displayed on the second screen is the direct feed from the camera.
A second device can connect to the same network if your GCS is connected to a WiFi network or hotspot.
To stream the video feed locally to a second screen, you need the following:
The IP address of the GCS.
VLC Media Player (recommended software) for viewing the video stream on the second screen device. The VLC Media Player is cross-platform compatible and can be installed on many devices.
The GCS and the second screen device need to be connected to the same Wi-Fi network or hotspot.
The DeltaQuad Evo and the GCS need to be powered on and connected.
When ground-testing the video feed with an infrared-capable camera it is important to provide active cooling. We recommend a USB fan pointed directly towards the camera.
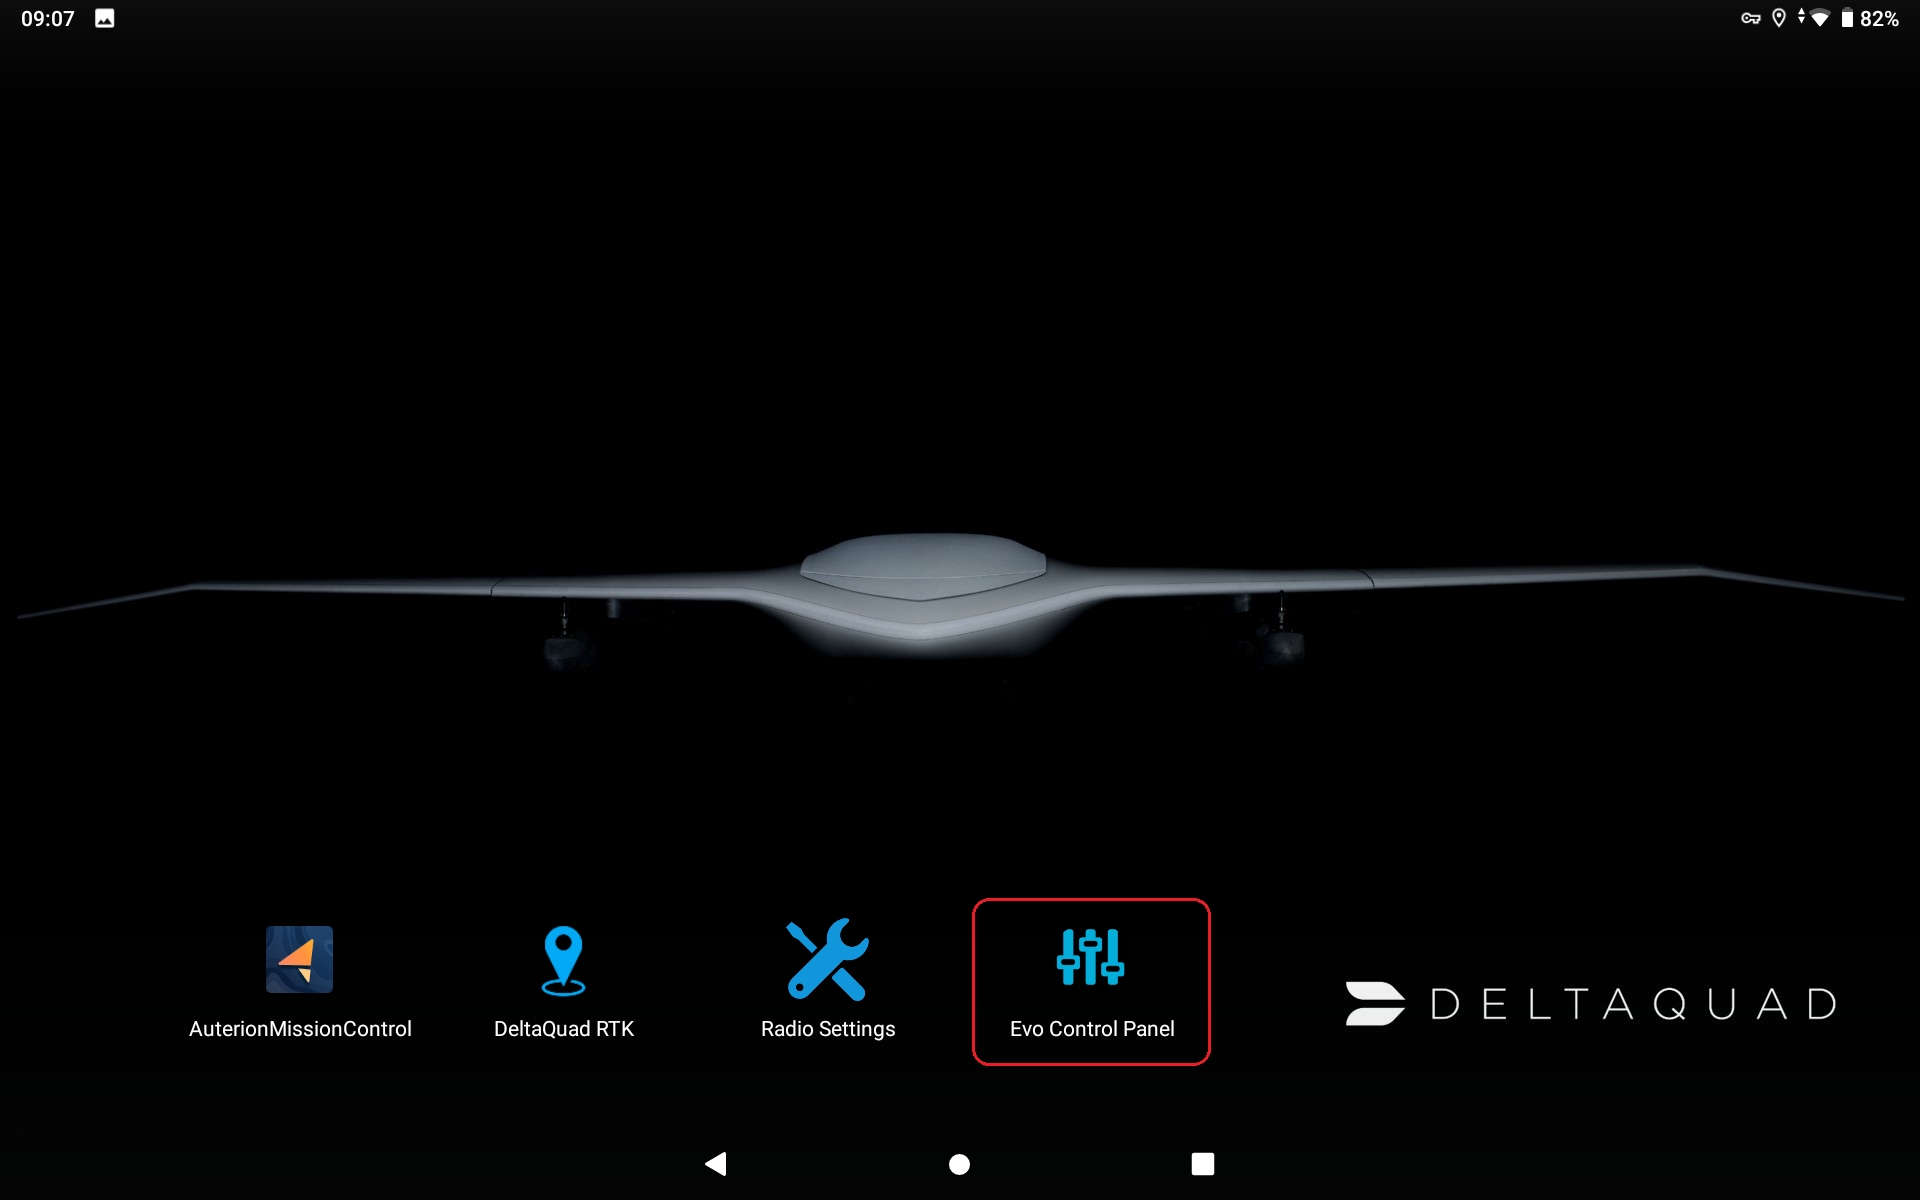
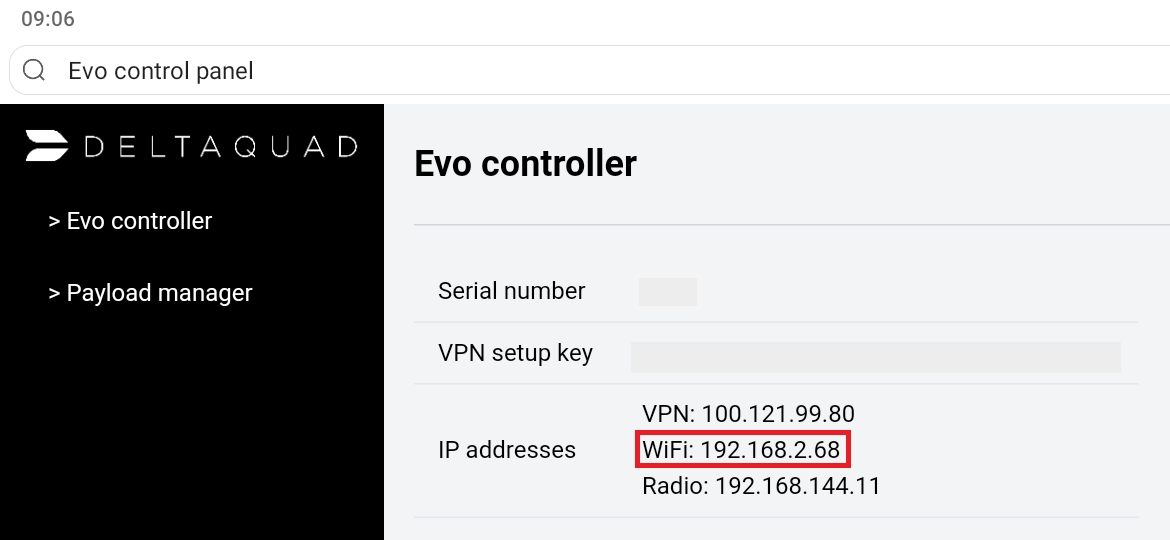
Once the GCS is connected to the Wi-Fi network or hotspot, you can determine the Wi-Fi IP address assigned to the GCS by opening the Evo Control Panel.
Here you will find the Wi-Fi IP address which shows the values for the IP address assigned by the Wi-Fi network or hotspot. The value required is the sequence of 4 numbers separated by a dot, in our example: 192.168.2.68
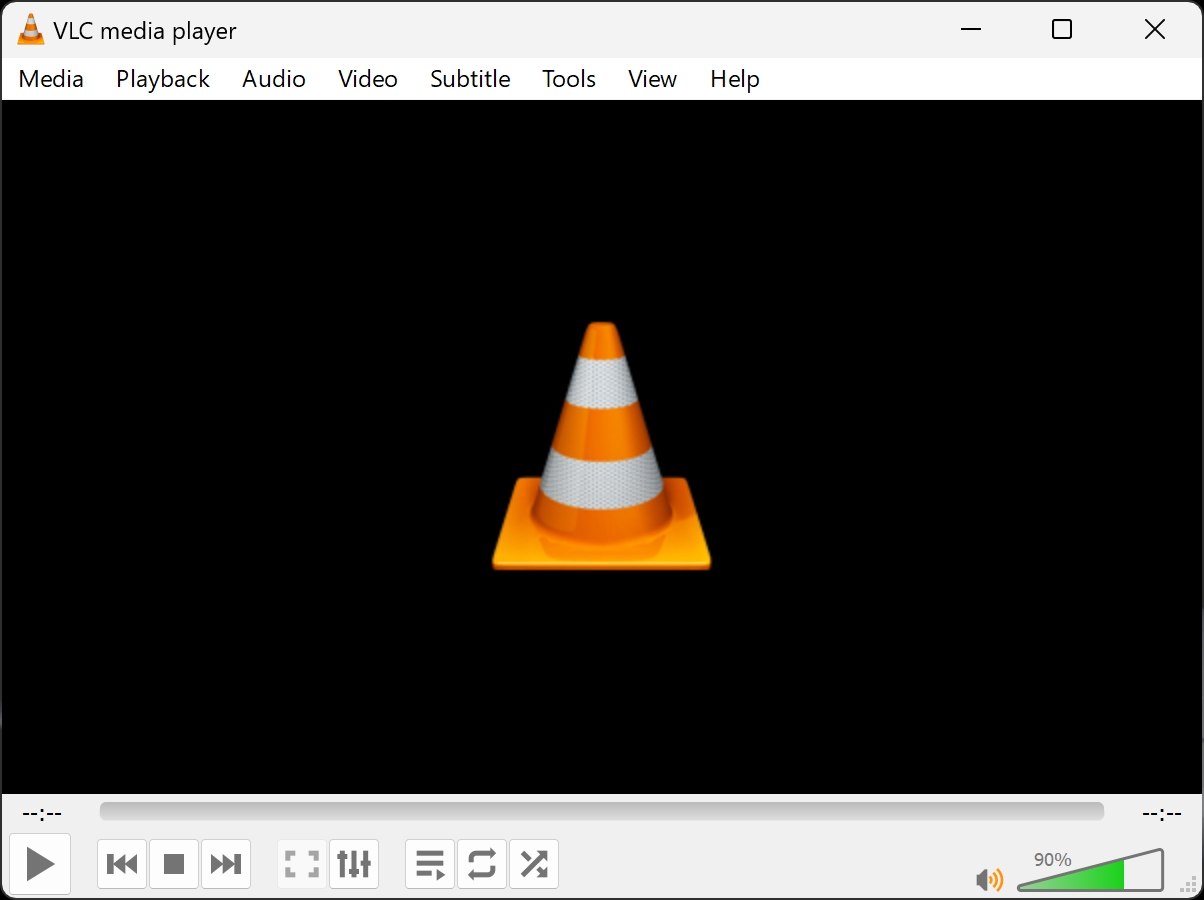
Make sure that the second screen device is connected to the same Wi-Fi network or hotspot as the GCS and open the VLC Media Player.
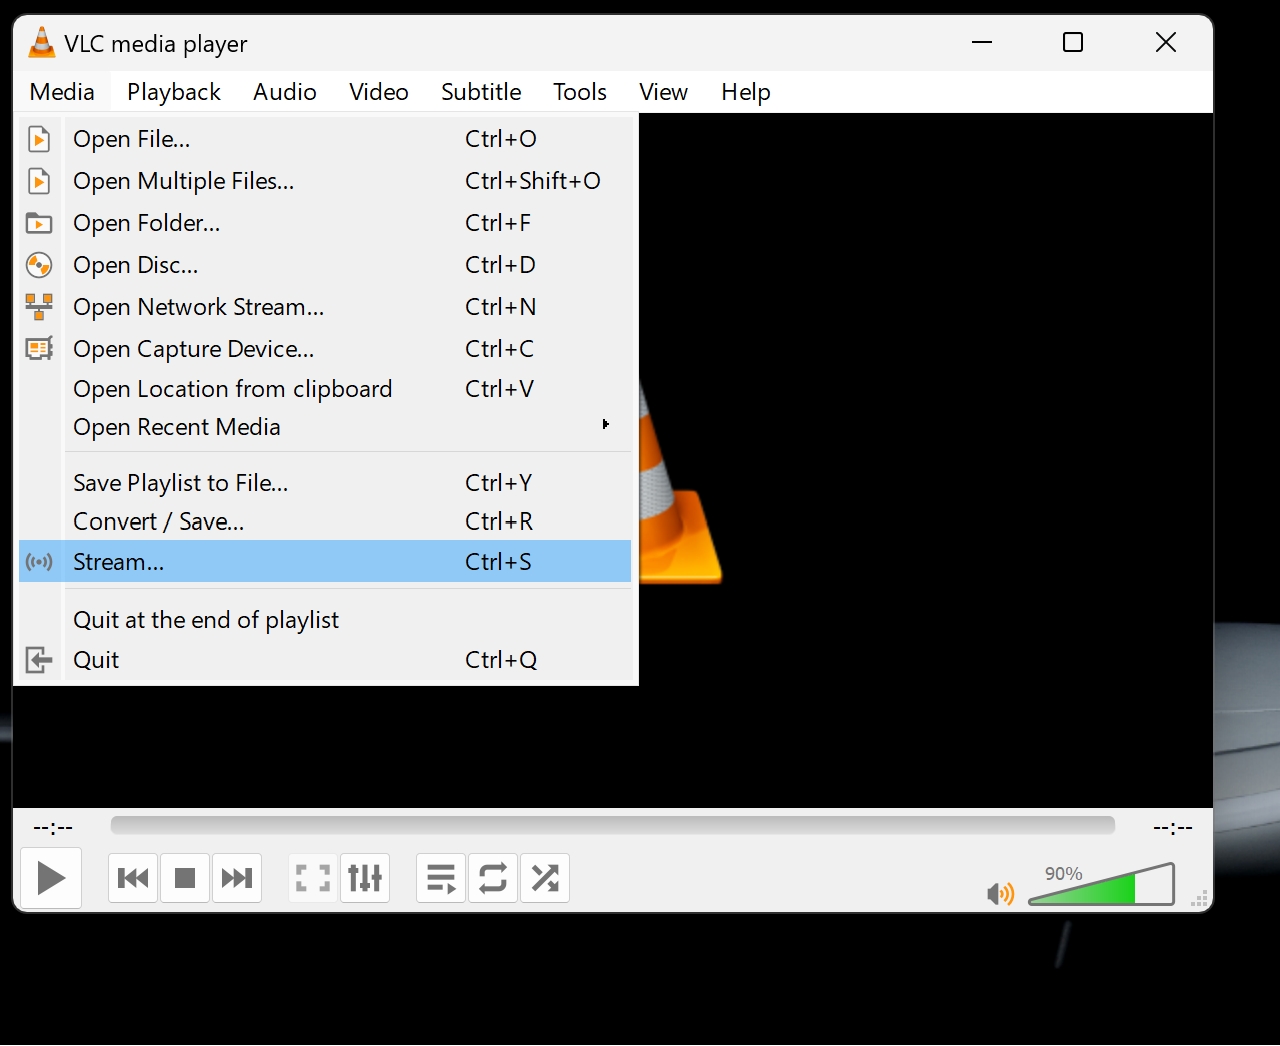
Go to Media and open the Stream... function.
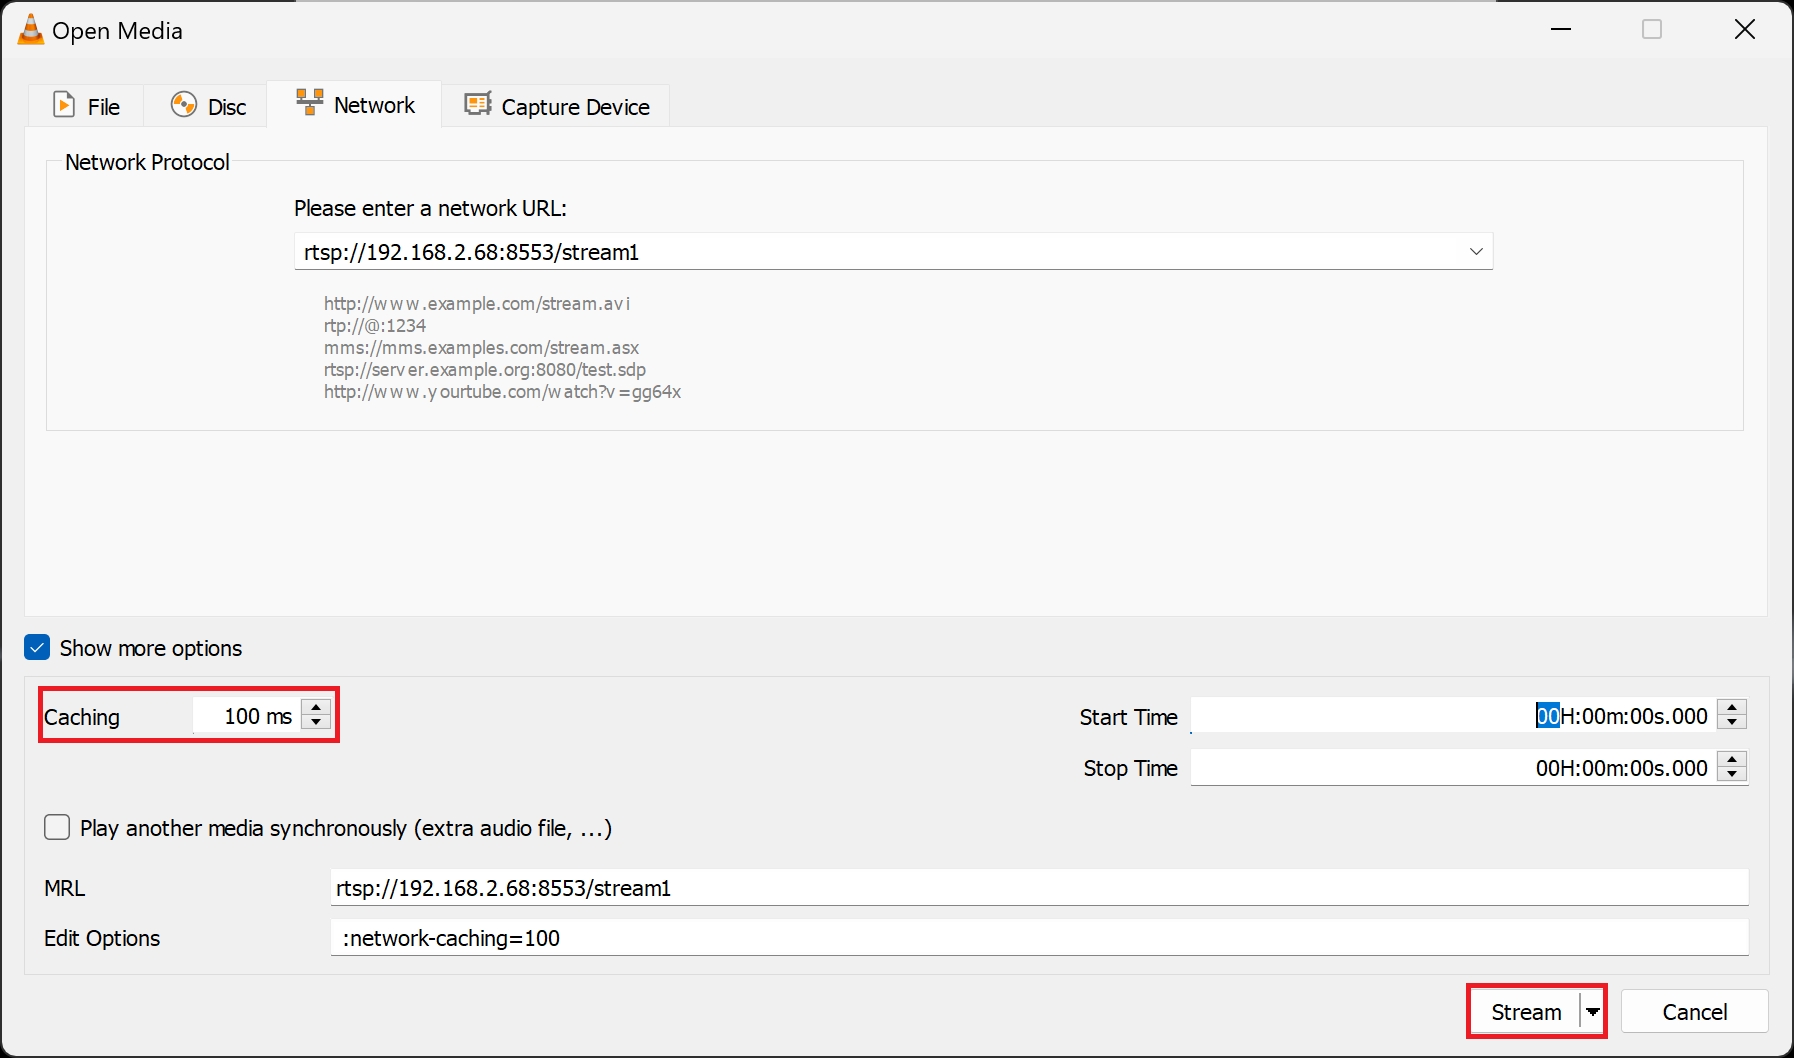
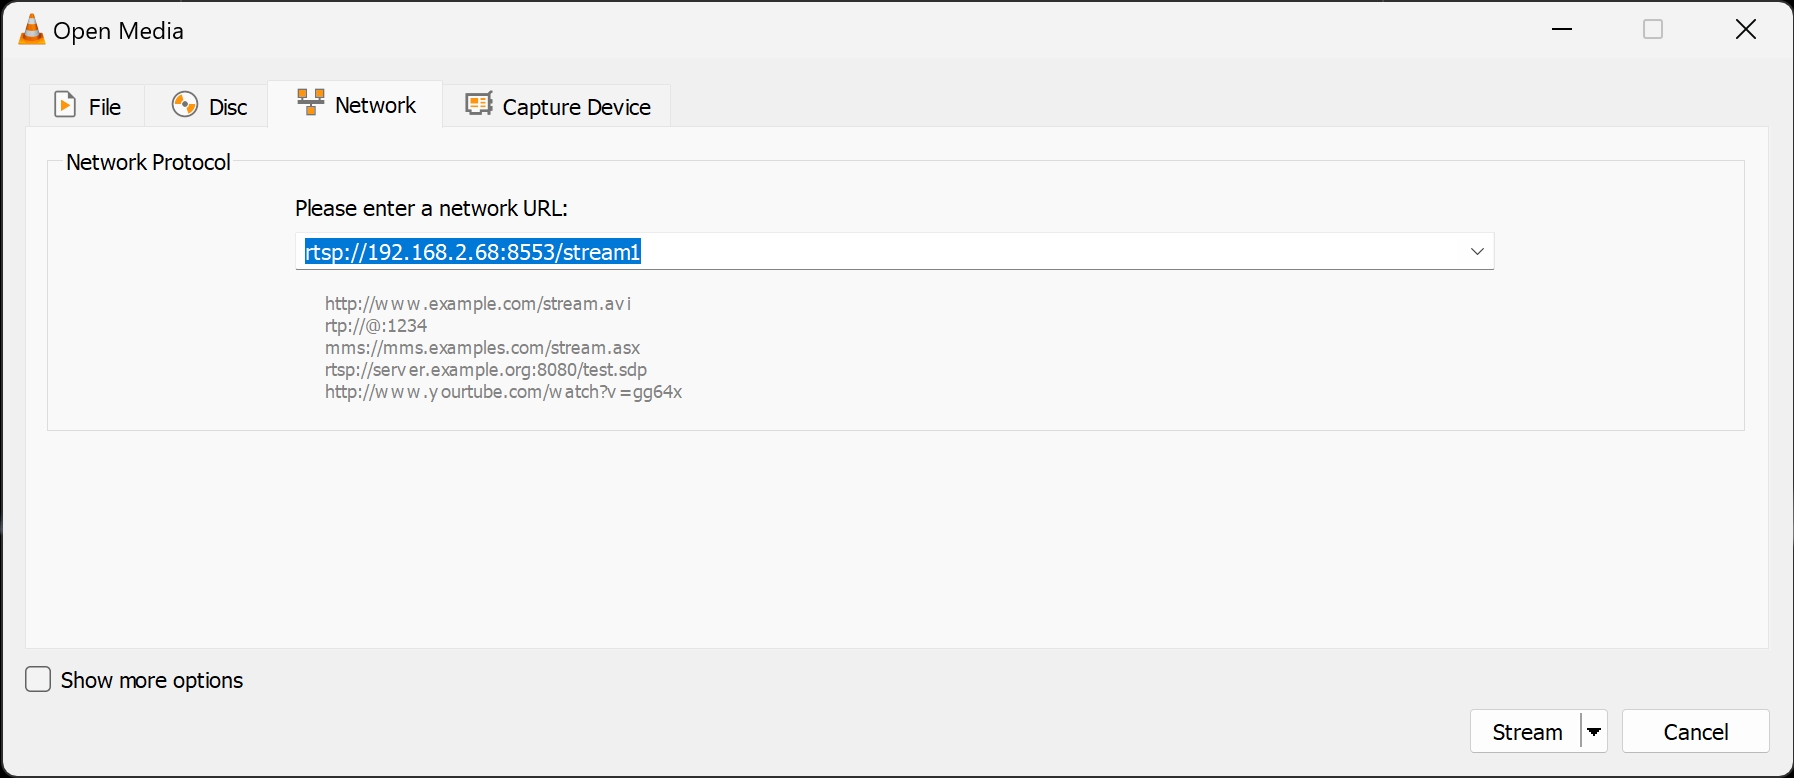
Go to the Network tab.
In the network URL field enter the following address:
In our example, it is rtsp://192.168.2.68:8553/stream1.
Check Show more options and set the value for Caching to 100ms. Click on Stream in the lower right corner of the window.
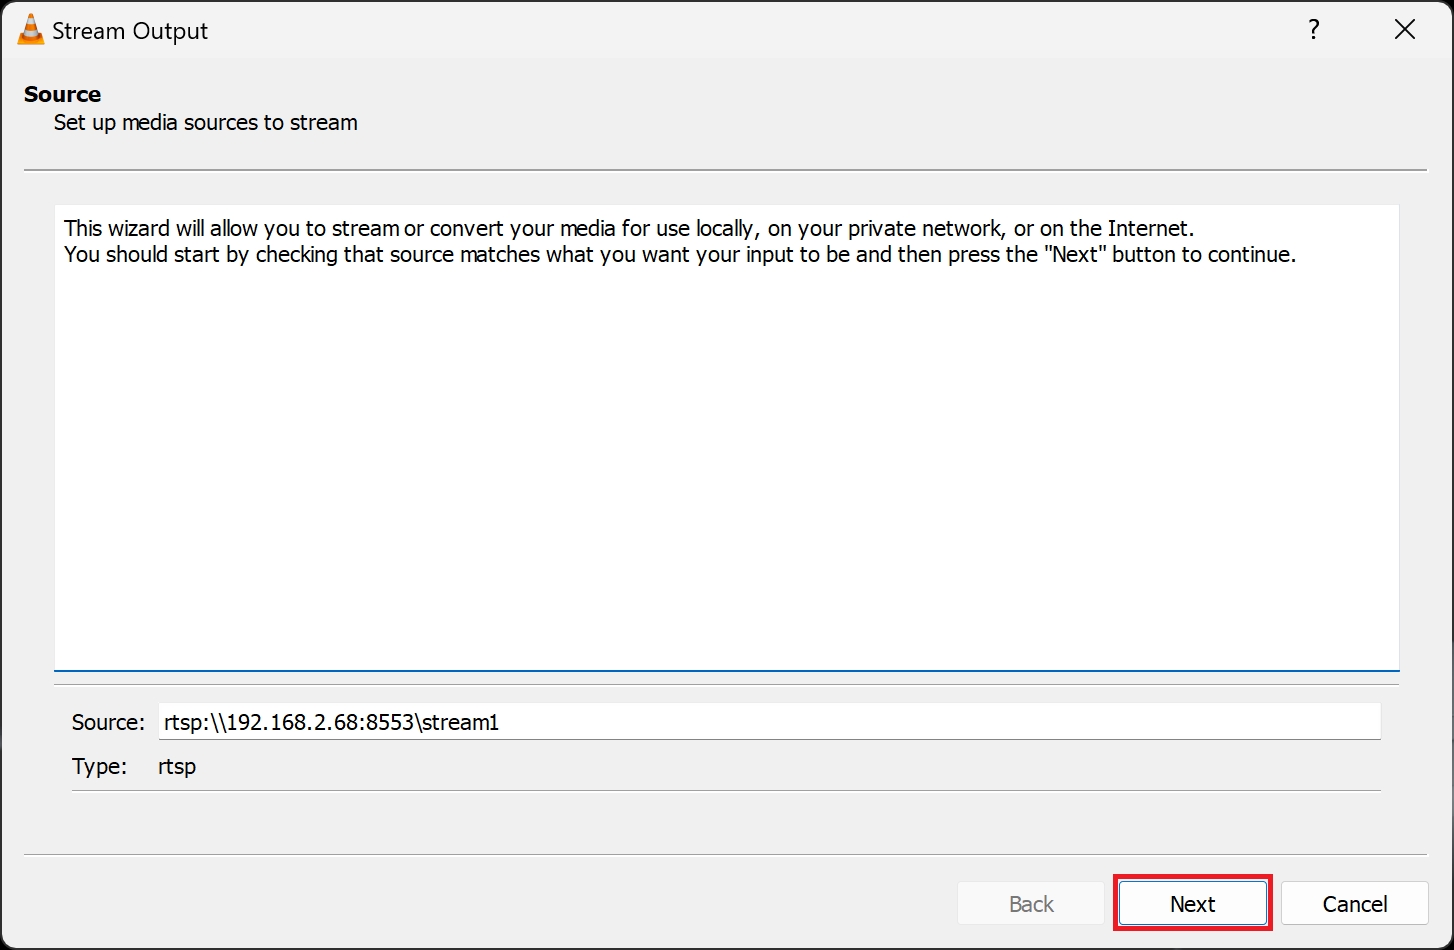
Click Next in the Source window.
Click Next in the Destination Setup window.
Click Next in the Transcoding Options window.
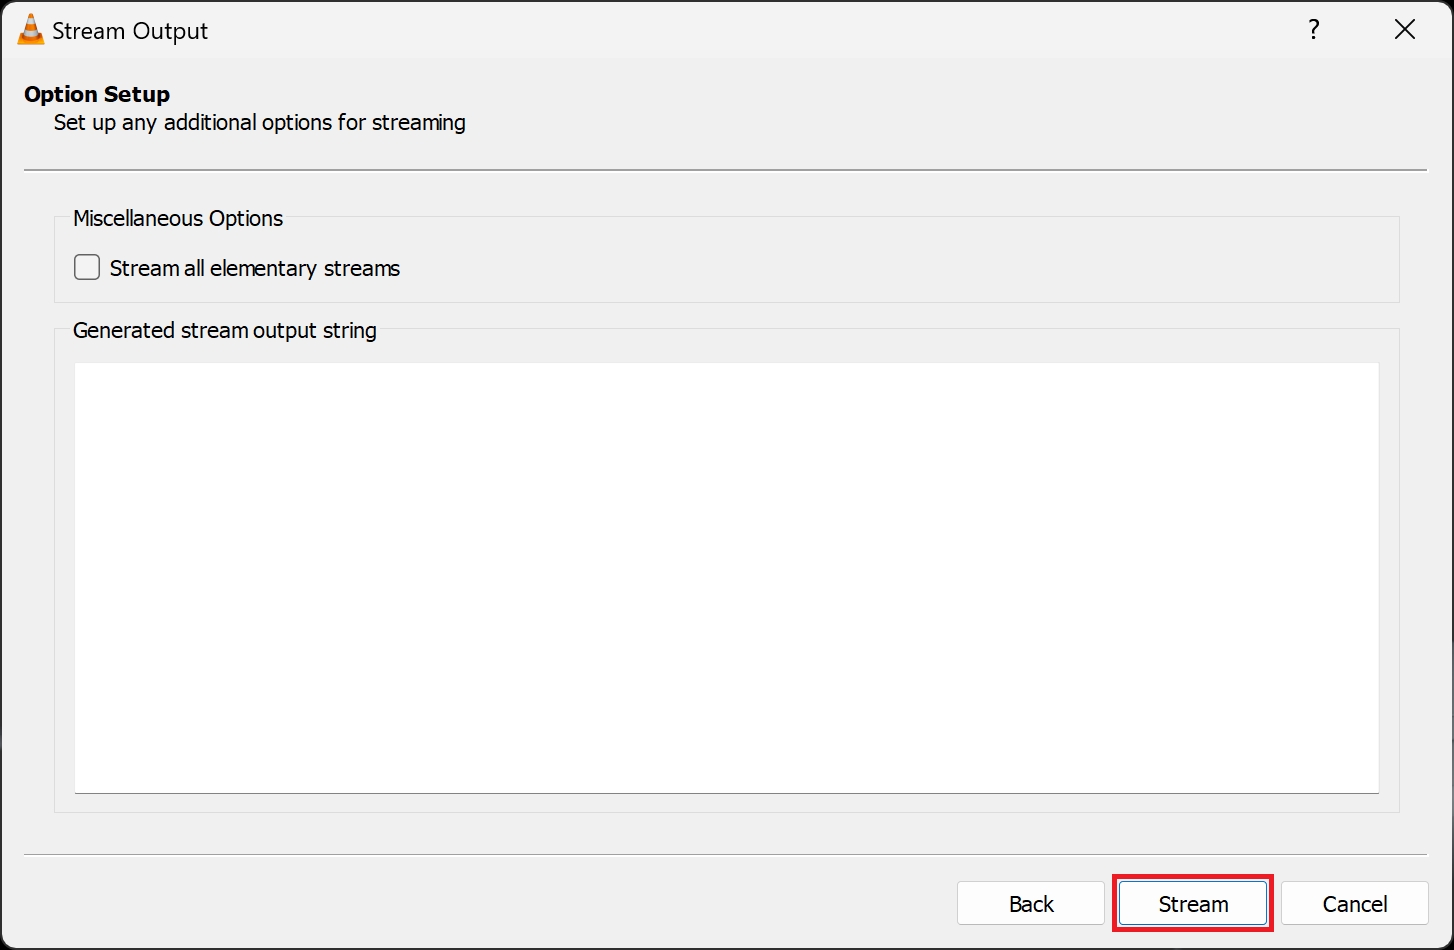
Click Stream in the Option Setup window.
After a few seconds, the video feed should appear in the VLC Media Player.
This section will discuss how to install, set up, and use NextVision payloads with the DeltaQuad Evo.
This section gives general information about the Raptor 360 payload and how to install it.
The Raptor is a lightweight long-range dual EO-IR stabilized camera turret. It features a significant IR range increase and an X80 EO zoom.
ZOOM
X80 (X40 + X2 digital)
FOV
60° WFOV – 1.5° NFOV – 0.75° DFOV
THERMAL RESOLUTION
1280×720
PITCH FOR
-45° to +80°
YAW/ROLL FOR
360° Continuous
WEIGHT
850 grams (complete payload)
The Raptor 360 can be installed in a single payload configuration or together with the auxiliary battery payload.
When using the Raptor 360 in a single payload configuration, it must be installed in payload slot 1 at the rear of the vehicle (near the pusher motor).
When using the Raptor 360 with the auxiliary battery, the auxiliary battery must be installed in payload slot 1, as it is the heaviest payload, and the Raptor 360 must be installed in payload slot 2.
For more information please review the chapter Auxiliary Battery Placement.
Each payload box features two arrows on top of each handle, corresponding to arrows on each side of the DeltaQuad Evo's payload bay. The arrows on the payload boxes must align with those in the payload bay, always pointing toward the front (nose) of the vehicle.
Each payload box has handles with two locking pins positioned opposite each other. To remove the payload box, grasp the handles with both hands, press the locking pins inward, and pull the payload box out.
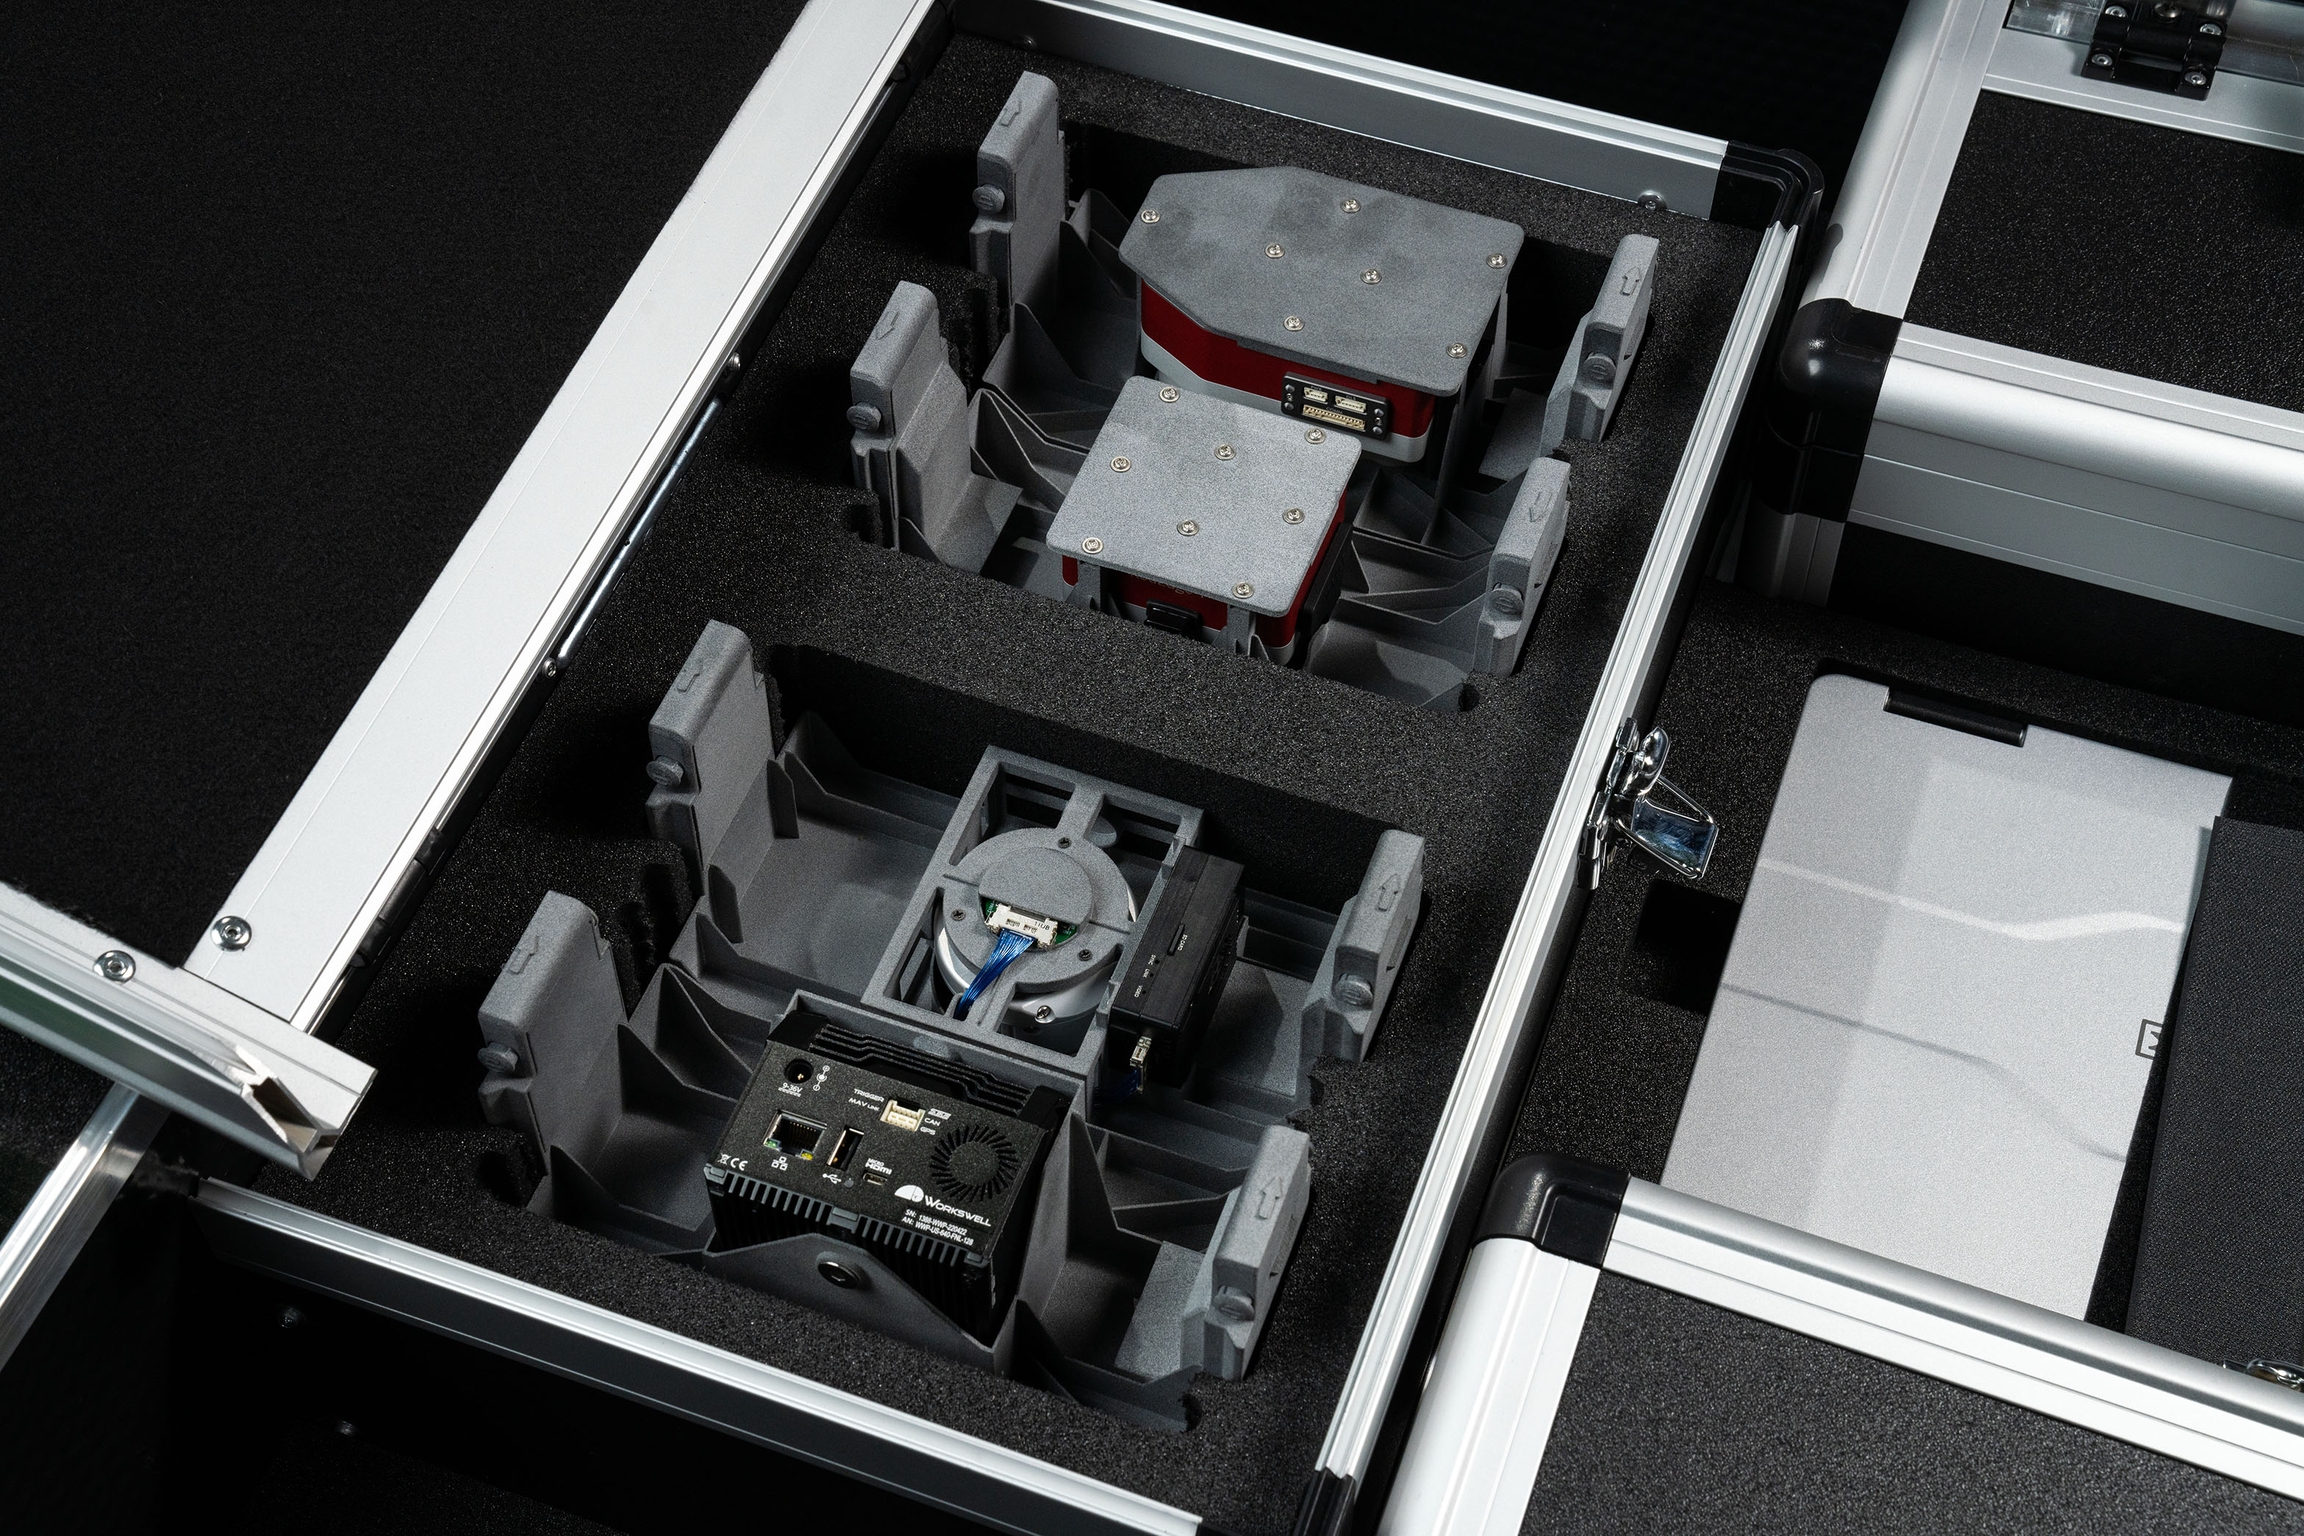
The payload box contains the camera and its onboard computer, the Trip 2. On top of the Trip 2, there is a micro SD card slot that accommodates cards of up to 32GB for onboard storage.
If onboard media storage is required, ensure that a compatible micro SD card is installed in the Trip 2 board computer and has sufficient available storage space.
This section gives general information about the Nighthawk2 payload and how to install it.
The Nighthawk2 is an EO/IR stabilized camera with a mere weight of 250 grams. The Nighthawk2 delivers powerful thermal observation alongside long-range visible imagery.
The Nighthawk2-V is a small-size dual EO-IR stabilized camera turret enabling long-range observation. Implementing technology breakthroughs makes the Nighthawk2-V the best camera in its weight class.
Nighthawk2-UZ is a dual EO-IR stabilized camera turret crafted for long-range observation applications that demand very low weight. Embodying technology innovations, Nighthawk2-UZ provides unmatched capabilities.
ZOOM
X40 (X20+X2 digital)
X40 (X20 + X2 digital)
X40 (X20 + X2 digital)
FOV
60° WFOV – 3° WFOV – 1.5° DFOV
60° WFOV – 3° NFOV – 1.5° DFOV
60° WFOV – 3° NFOV – 1.5° DFOV
THERMAL RESOLUTION
640×480
640×480
1280×720
EO-IR
Single
Dual
Dual
PITCH FOR
-45° to +135°
-45° to +135°
-45° to +135°
YAW/ROLL FOR
-180° to +180°
-180° to +180°
-180° to +180° Optional 360° Continuous
WEIGHT
670 grams
740 grams
770 grams
The Nighthawk2 can be installed in a single payload configuration or together with the auxiliary battery payload.
When using the Nighthawk2 in a single payload configuration, it must be installed in payload slot 1 at the rear of the vehicle (near the pusher motor).
When using the Nighthawk2 with the auxiliary battery, the auxiliary battery must be installed in payload slot 1, as it is the heaviest payload, and the Nighthawk2 must be installed in payload slot 2.
For more information please review the chapter Auxiliary Battery Placement.
Each payload box features two arrows on top of each handle, corresponding to arrows on each side of the DeltaQuad Evo's payload bay. The arrows on the payload boxes must align with those in the payload bay, always pointing toward the front (nose) of the vehicle.
Each payload box has handles with two locking pins positioned opposite each other. To remove the payload box, grasp the handles with both hands, press the locking pins inward, and pull the payload box out.
The payload box contains the camera and its onboard computer, the Trip 2. On top of the Trip 2, there is a micro SD card slot that accommodates cards of up to 32GB for onboard storage.
If onboard media storage is required, ensure that a compatible micro SD card is installed in the Trip 2 board computer and has sufficient available storage space.
This section explains how to control the Raptor 360 and Nighthawk2 camera payloads.
When bench testing the Raptor 360 or Nighthawk2 camera, it is important to provide direct cooling to the camera housing using a USB fan or a similar device.
The USB fan can be powered by a power bank or directly through the USB socket in the Evo.
Heat Generation: The Raptor 360, like many electronic devices, generates heat during operation, particularly when it is active for extended periods. Excessive heat can lead to malfunctions or permanent damage to the internal components such as the thermal sensor.
Operating Temperature: Maintaining an optimal operating temperature is crucial for the camera to function correctly. Cooling helps keep the device within its recommended temperature range.
Thermal Distortion: Overheating can cause thermal distortion, which can negatively impact image quality. This includes issues like noise in the images, reduced clarity, or incorrect color representation.
Calibration: Consistent temperatures are essential for accurate calibration of sensors. If the camera heats up, it may affect its calibration and performance during testing.
Prolonged Use: During ground testing, the camera may be operational for extended periods. Providing active cooling, such as with a USB fan, allows for longer testing sessions without risking overheating.
Performance Evaluation: To accurately evaluate the camera's performance, it should be tested under conditions that reflect its actual usage scenarios. Keeping it cool helps simulate realistic operational conditions.
Avoiding Failures: Consistent cooling can help reduce the risk of system failures during critical operations. An overheated device can shut down unexpectedly, leading to loss of data or interruption of important tasks.
Component Lifespan: By keeping the Raptor 360 cool, you can potentially extend its lifespan, reducing the need for repairs or replacements.
When the DeltaQuad Evo and the GCS are powered and connected, the video feed will be visible in AMC on the small video screen in the Fly View's bottom-left section.
You can toggle between the video being the primary view or the map being the primary view by clicking on the small screen in the lower-left corner.
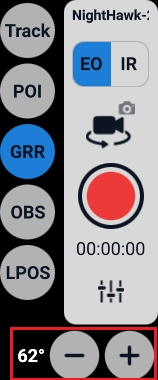
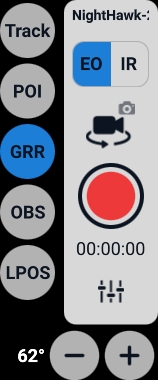
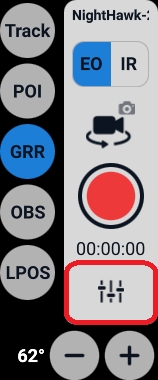
When the video feed is the primary view, the camera controls appear on the right side of the screen.
The camera controls allow you to set the following camera modes:
Target tracking is the mode where the camera will remain focused on a target. The target can be moving or static. Activate target tracking by tapping on the Track button. Simply tap anywhere in the video feed and the camera will enter tracking mode and track the target that was tapped on. You can tap several times to fine-tune your target tracking mode.
When a target is being tracked, a white square is displayed on the object that is being tracked. By moving the camera joystick, tracking is disabled and the camera returns to the previous mode.
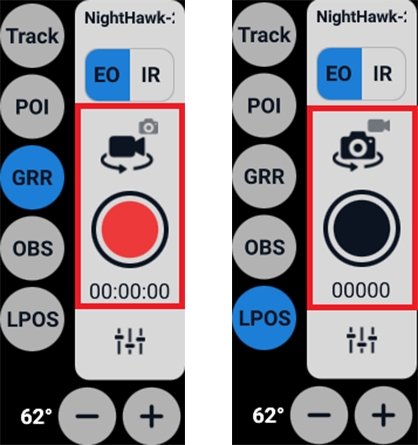
When clicking on the camera symbol the recording mode can be switched between photo and video recording.
The red button indicates the video recording mode.
The black button indicates the photo recording mode.
The -/+ button controls the zoom of the camera. The zoom level is indicated by degrees.
The fader button opens the camera menu with access to camera settings and general settings.
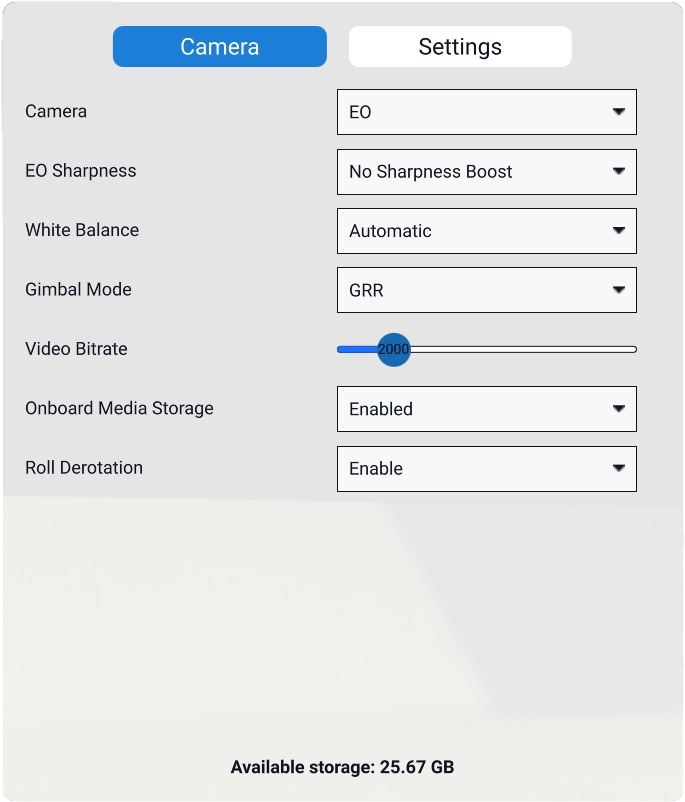
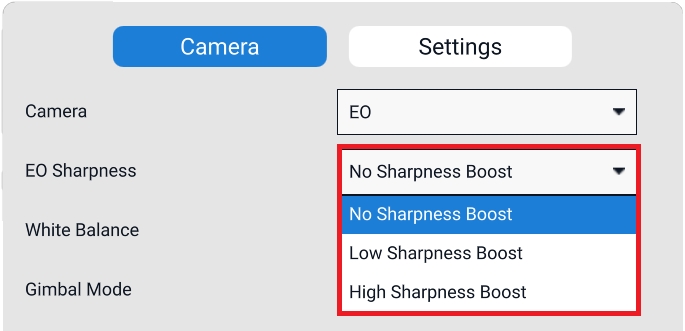
The camera settings tab gives access to the following options:
Camera: Switch between EO and IR mode. This mode can be also accessed via the camera controls in the Fly View.
EO Sharpness: This option gives three different degrees to boost the sharpness of the image.
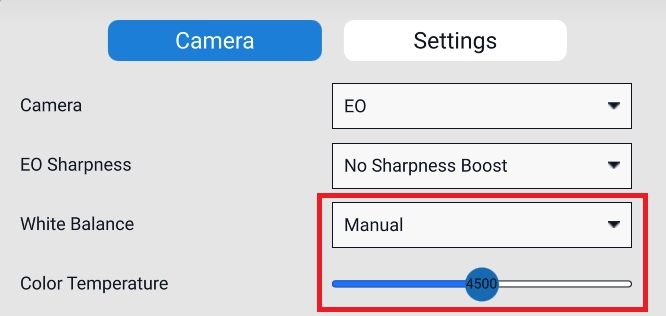
White Balance: Switch between Automatic and Manual mode.
When White Balance is set to Manual a slider appears to set the white balance manually:
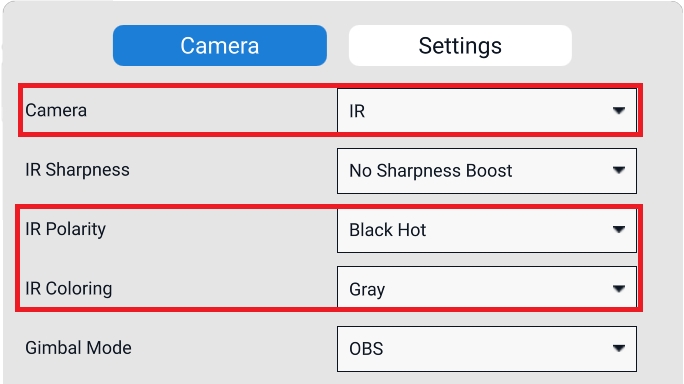
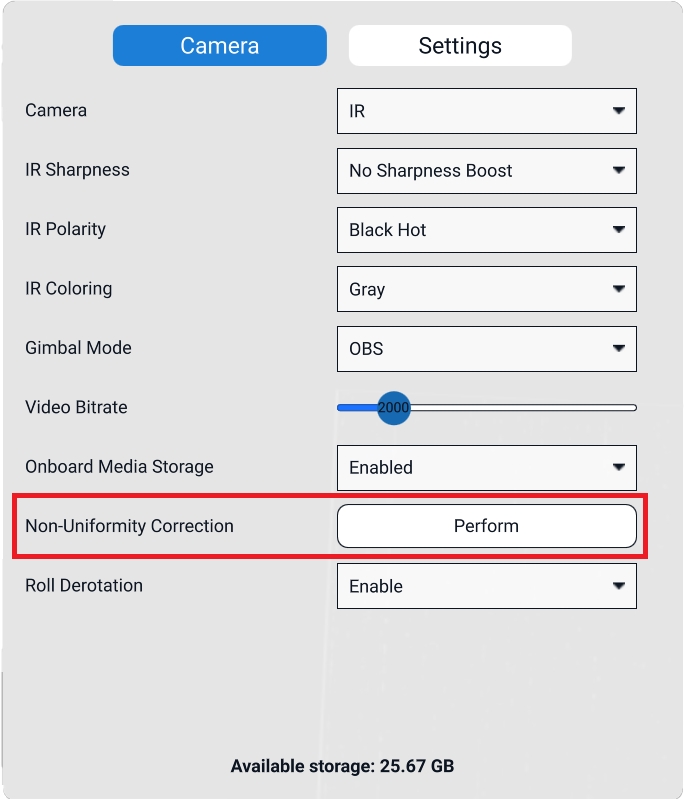
When IR is chosen as the camera mode more options will be available for this mode:
IR Polarity: In this tab, the operator can choose to have either Black Hot or White Hot.
IR Coloring: In this tab, the operator can choose between the Gray scale or the Color scale.
Non-Uniformity Correction (NUC): After engaging the IR mode, the IR camera needs to be calibrated for a clear view. This is done automatically by the system. NUC performs this calibration which takes about 3 seconds.
It is recommended to use a uniform field for calibration and to avoid variable heat sources in the field of view during NUC.
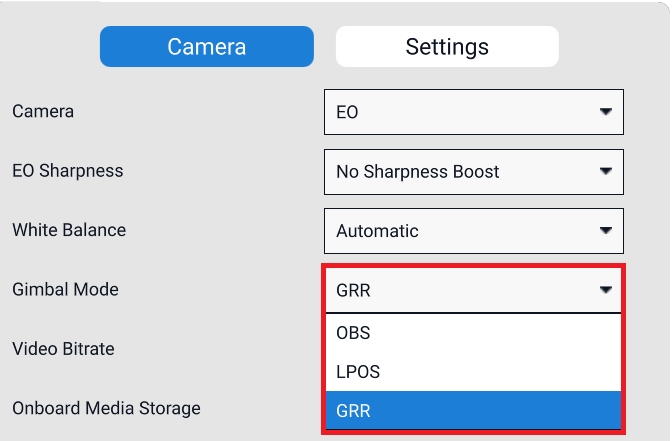
Gimbal Mode: In this tab, the operator can switch between GRR, OBS, and LPOS gimbal modes. These camera control options are also available in the Fly view via the camera controls.
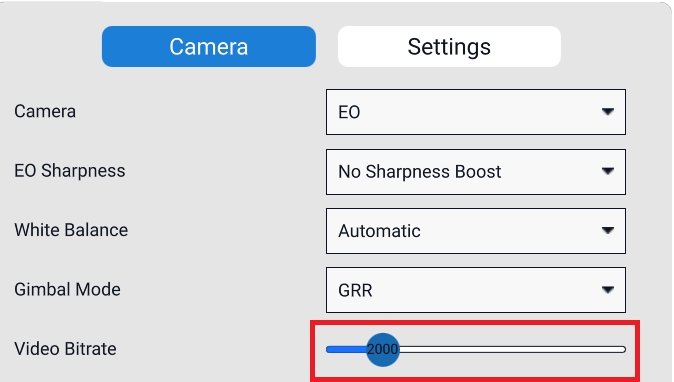
Video Bitrate: With this slider the video bitrate can be set. By default, the value is set to 2000. The higher the bitrate the better the video image will be but at the cost of the maximum telemetry distance.
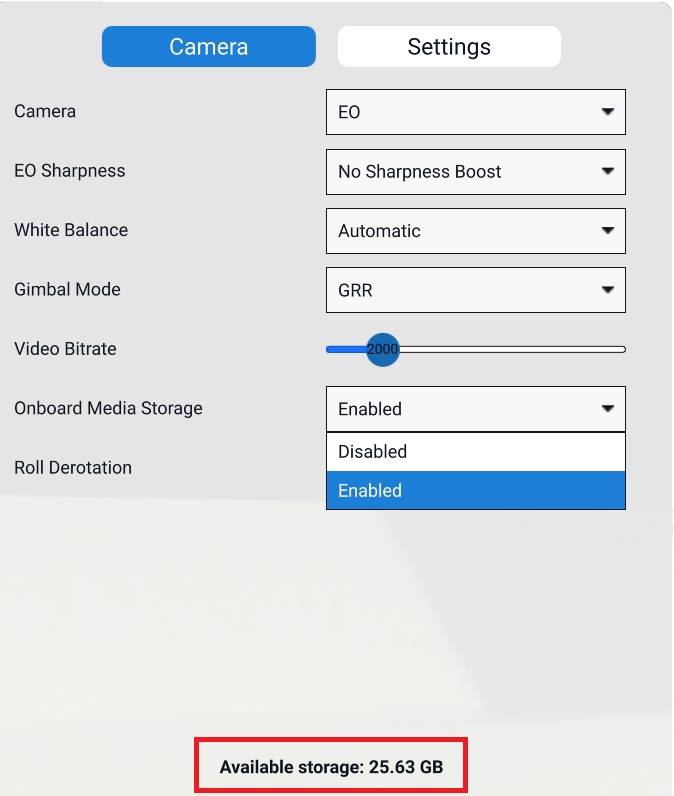
Onboard Media Storage: With this option, you can enable or disable the Onboard Media Storage. When enabled, the media will be stored on the SD card in the Trip board computer located in the payload. When disabled, the media will be stored on the GCS.
At the bottom of the window, the available storage for video recording will be displayed.
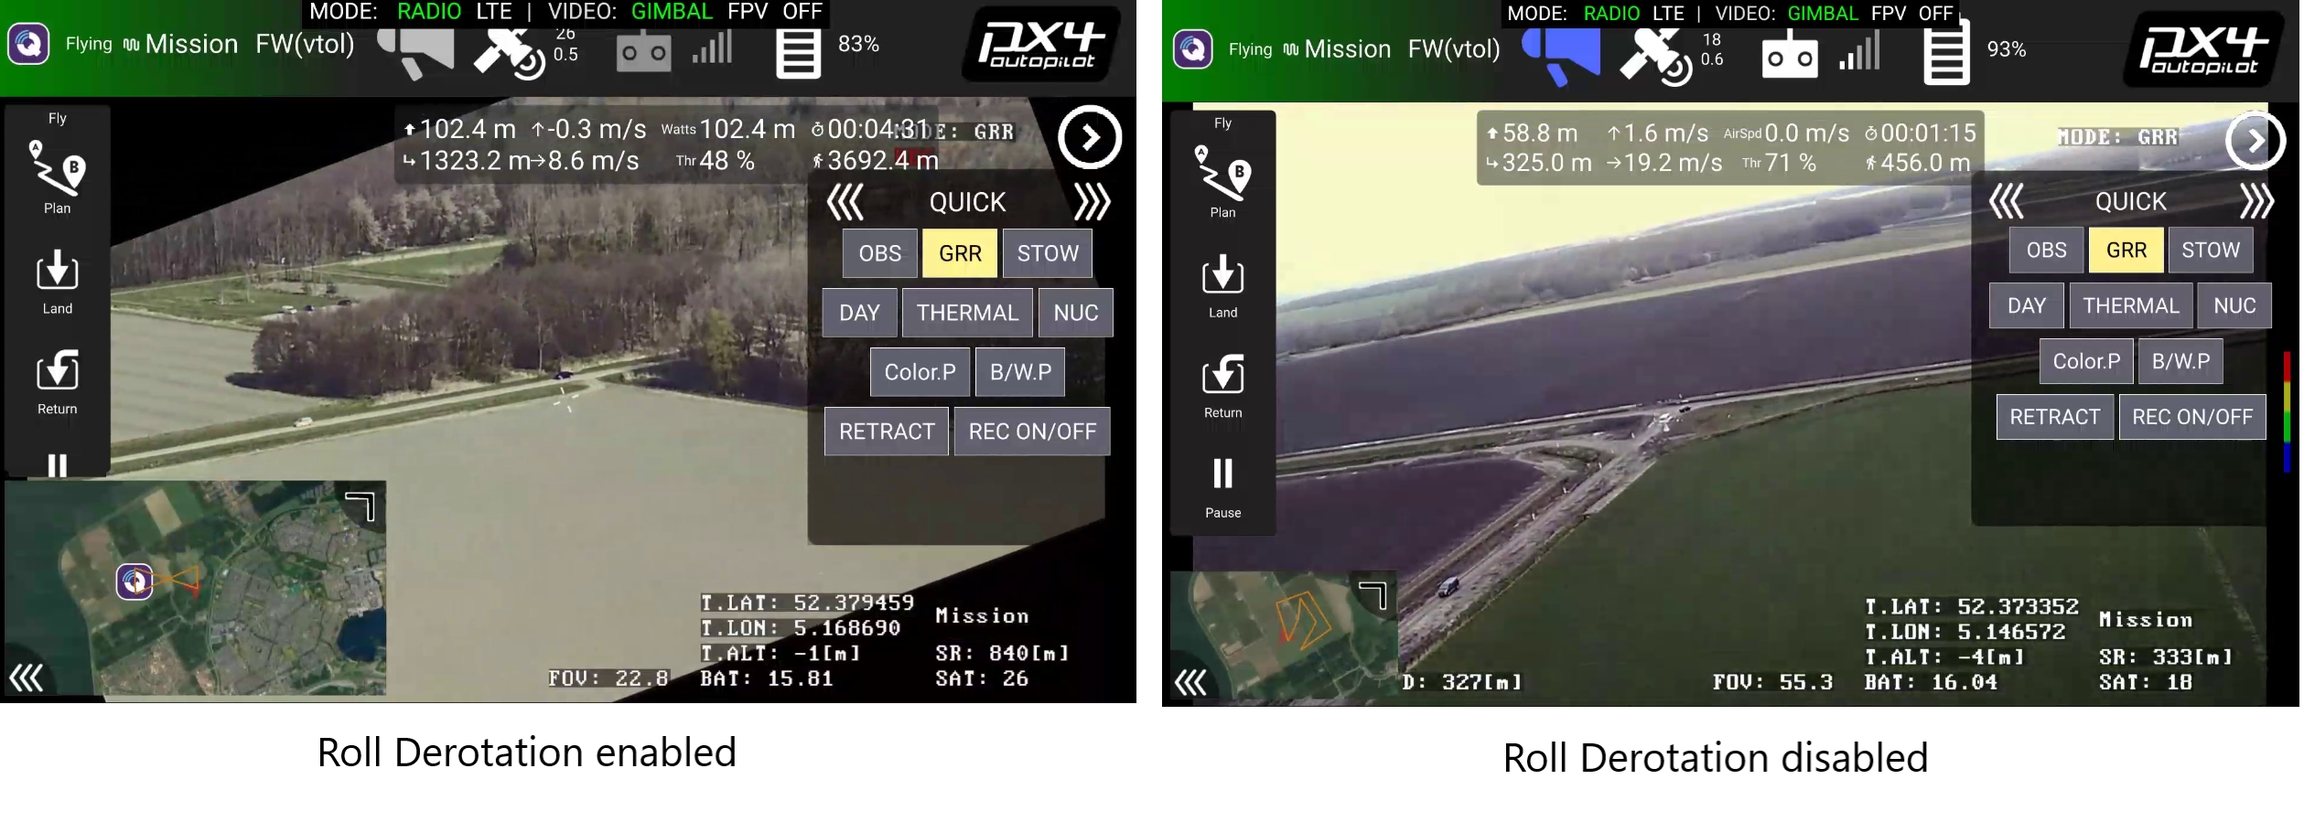
Roll Derotation: The camera is capable of keeping the video stream aligned with the horizon when the vehicle is banking. This is called roll derotation.
When roll derotation is active the video image displayed on the controller will rotate in such a way that the image remains level. The trade-off is that the video can show black corners when the vehicle is banking.
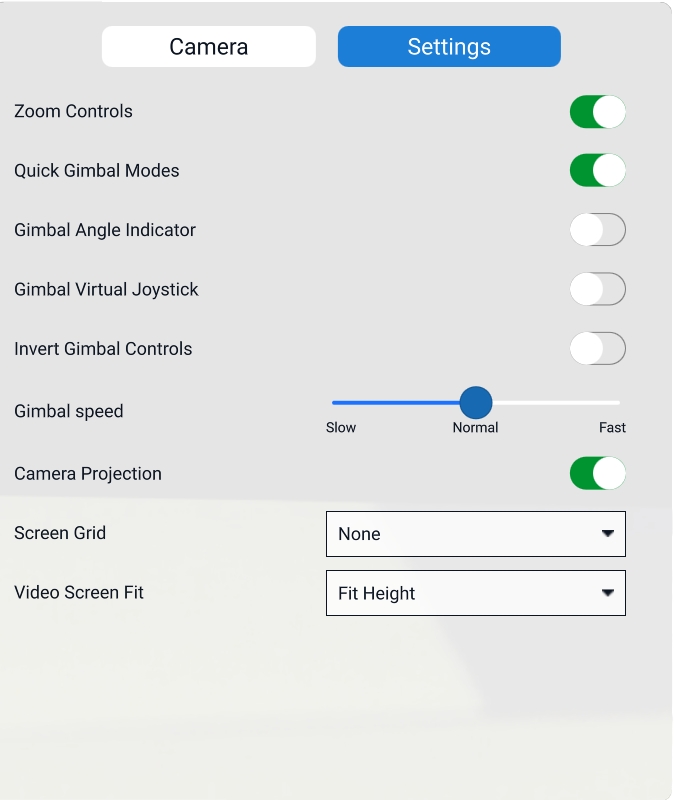
The Settings tab on the upper right corner of the menu gives access to general settings:
The grid option is either a square or a screen division by 3x3:
Target following is the mode where the vehicle actively follows a tracked target. To engage target following mode you will first need to track a target. Once a target is locked you can engage target following by giving the Target Following command. The command is located on the left side of the Fly View where the pilot commands are located.
The system will start following a target when these conditions are met:
A target is actively being tracked
The target is less than 2,000 meters away from the vehicle
Target following has been enabled
When entering target following the vehicle will issue reposition commands for as long as the target following conditions are met. If the conditions are no longer met the vehicle will remain circling the position of the last known target location. If the tracked target is lost you can re-engage target tracking by simply tapping on the object in the video feed, the system will follow any target selected while target following is enabled and the conditions are met.
If the vehicle is flying above the tracked target, or if the vehicle is flying faster than the tracked target, it will circle above the target keeping the target in view at all times.
If target following is disengaged the vehicle will start circling its current position.
When the map is the primary view, a Point of Interest (POI) can be established by clicking on the POI button on the left side of the screen.
The POI button will be available when the Flight Tools are selected (the paper plane in the lower-left corner).
Tap the desired location on the map, and the gimbal will attempt to maintain focus on the selected POI's location on the ground.
To cancel a POI click the button Cancel POI in the upper left corner of the screen.
Alternatively, you can set a POI while in camera view (video feed is primary view) by selecting the POI option in the camera controls and tapping on the specific point of interest within the video frame.
When a POI is selected in the video feed, it will also be visible on the map at the center of the camera projection.
Slant Range (SR) is the straight-line distance from a sensor to a target, measured along the line of sight, accounting for elevation differences.
Slant range calculations are more accurate when the camera is angled downward rather than horizontally. A downward angle maximizes the vertical component of the distance to the target, reducing distortion and obstructions, and provides a clearer line of sight. This is especially important when the tracked object is at a different elevation than the ground underneath the vehicle. In contrast, a horizontal view increases the horizontal distance and minimizes the vertical component, leading to less reliable slant range measurements.
Vertical Component Maximization: When the Raptor camera is angled downward, the vertical component of the distance to the target is greater relative to the horizontal distance. This makes it easier to calculate the slant range accurately, as the sensor can more effectively measure the distance to the target without the influence of excessive horizontal distance.
Perspective and Distortion: A downward angle reduces perspective distortion because the camera views the target more directly. In contrast, a horizontal view can exaggerate distances due to the angles involved, making it harder to ascertain precise distances.
Elevation Differences: When the tracked object is at a different elevation, a downward angle helps capture that elevation difference more effectively. If the camera is horizontal, the accuracy of slant range calculations can be compromised, especially if the object is significantly higher or lower than the UAV's altitude.
Obstructions: A downward angle helps avoid obstructions in the foreground that could interfere with the line of sight to the target. Horizontal views may have more potential obstructions affecting the clarity and accuracy of the tracking.
If no POI is selected and no object is tracked, the Geo-Tracking Dashboard will display the values corresponding to the camera's center field of view.
This section describes how to use the NextVision Video Player and access the metadata recorded with the Raptor 360 or Nighthawk2.
The videos recorded with the Raptor 360 and Nighthawk2 include KLV metadata. KLV (Key-Length-Value) is a metadata encoding standard used in video recordings to embed structured information, such as timestamps, geographic location, and camera parameters, alongside the video content for better analysis and interoperability.
The video's metadata can be accessed via the NextVision Video Player. Follow the link below to download and install the player.
After the installation has been completed, please follow these steps to access the video's metadata.
Open the Video Player.
Click on Open in the upper-left corner of the screen and choose Playback.
A window will open. Choose the video file in question. It must be a *.ts file (Transport Stream).
The selected video will be displayed in the video player. Enable the KLVs option to display the video's metadata.
IDs 21 to 25 display relevant geolocation data for the frame center, including the slant range.
This chapter discusses the automation payloads available for the DeltaQuad Evo.
DeltaQuad's Aerial Payload Deployment Systems (APDS) comes in two versions.
Single APDS for one larger cargo drop or two smaller cargo drops.
The dividers can be used to either center a larger cargo or divide the payload area into two separate sections, allowing for the dropping of two cargos at different locations.
The total maximum cargo weight for the single APDS is 2.5 kg
APDS with an auxiliary battery provides extended flight time, increased range, and the possibility of one cargo drop.
The dividers can be used to center the cargo within the bay.
The maximum cargo weight for the APDS with auxiliary battery is 1 kg.
Both payload boxes are designed in a dual payload configuration, occupying the space of Payload Slot 1 and Payload Slot 2.
Each payload shows two arrows on top of two handles.
There are corresponding arrows on both the left and right sides of the DeltaQuad Evo's payload bay.
The arrows on the payload boxes must be aligned with the arrows in the payload bay.
We recommend an altitude of 40 meters when triggering the APDS doors for the best precision.
For optimal flight stability and best results, it is recommended to plan the mission so that the vehicle flies into the wind when the APDS is triggered.
To program the command for triggering the APDS doors, an additional waypoint must be planned and set as a Custom Action Command.
Create a waypoint at the location and altitude where the APDS doors should be triggered. In the example below, the doors should open at waypoint 4.
Create another waypoint anywhere on the map.
In the Mission Editor, on the right side of the screen, click on the Waypoint type (Waypoint).
A menu will open, allowing you to Select a Waypoint Type, choose Action.
As soon as the Waypoint Type is set to Action, waypoint 5 will be attached to waypoint 4 as a Custom Action.
In the Mission Editor, the Action tab is available on the right side of the screen. When you click on it, a drop-down menu will appear. Select Payload drop open both doors.
We have now planned a payload drop at waypoint 4 at an altitude of 40 meters. Finish the mission with the subsequent waypoints and a landing pattern.
Waypoint 4 has an altitude of 40 meters. For improved precision, waypoints 3 and 5 can also be planned at the same altitude. This allows the vehicle to maintain a consistent altitude before and after the drop, aiding in the precision of the drop.
For a less visible approach and a fast retreat, waypoints 3 and 5 can be set at a higher altitude.
For the Single APDS, three custom actions are available:
Payload drop - open both doors
Payload drop - open the right door
Payload drop - open the left door.
For the APDS with Auxiliary Battery, two custom actions are available:
Payload drop - open the right door
Payload drop - open both doors (only the right door will open!)
For more information please review the chapter about the .
Whenever a POI is selected or an object is tracked, its geolocation and slant range are displayed at the top of the screen, directly under .
For more information about placing the auxiliary battery, please read the details .
Install the APDS and place the cargo centered inside the APDS before going through the . Use the provided dividers to center the cargo if necessary.
If the APDS with the auxiliary battery is in use, please review the section on how to install it .
To use the APDS, a mission plan must be created. Plan a VTOL Takeoff and Transition, along with Intermediate Waypoints, up to the location where you wish to open de APDS doors. Please review the instructions for planning a , and
A payload drop can be planned in conjunction with a Stealth Switch, which is recommended if no radio emissions should be present during the drop. First, plan a waypoint with a custom action that engages the Stealth Switch. The next step is to plan the payload drop. Lastly, plan a waypoint to turn the radio back on. Please review the chapter on the Stealth Switch .
Track
By pressing the Track button and subsequently choosing an object within the video display, you can instruct the gimbal to track that specific object. This functionality is most effective when there is a clear contrast between the object and its background.
POI
You can establish a Point of Interest (POI) on the map view by simply tapping the POI button and then tapping on your desired location on the map. Alternatively, you can set a POI while in camera view by selecting the POI option and tapping on the specific point of interest within the video frame. The gimbal will then make an effort to maintain focus on the selected POI's location on the ground.
GRR
In this mode, the camera will hold its position relative to the ground. This is the recommended mode for camera control. The joystick controls the camera.
OBS
In this mode, the camera will hold its position relative to the vehicle's movement. The joystick controls the camera.
LPOS
LPOS (Local Position) is the mode in which the camera tracks the orientation of the aircraft, so when it makes a turn, the camera maintains the same angle relative to the aircraft.
EO (Electro-optical)
Activates the RGB (normal color video) mode of the camera.
IR (Infra-red)
Activates the Infrared camera for night vision and seeing between foliage.
Zoom Controls
Enables zoom controls in the camera control window.
Quick Gimbal Modes
Makes the gimbal modes (GRR, OBS, and LPOS) available in the camera control window.
Gimbal Angle Indicator
The camera angle (in degrees) will be displayed in the Fly view.
Gimbal Virtual Joystick
Enables a virtual joystick left of the camera control interface in the Fly view.
Invert Gimbal Controls
Inverts the gimbal controls.
Gimbal speed
With the slider, the gimbal speed can be set. It is set to Normal by default.
Camera Projection
Screen Grid
This option will display a grid overlay on top of the video image.
This section will provide a detailed description of the functionality of each available payload for the DeltaQuad Evo.
This chapter gives an overview of the single and dual Custom Payload Kits.
The DeltaQuad Custom Payload system is a versatile and modular solution designed for users who need to integrate custom payloads into the DeltaQuad Evo platform. It offers customizable development kits that include everything required to design, build, and attach payloads to the drone. With available 3D models, users can modify the mounting structure to ensure tool-less integration, making the payload attachment quick and efficient.
Product Variants:
Single Payload: This option provides a compact payload space with dimensions of 225.6 x 103 x 107.5 mm.
Dual Payload: Larger, with two configuration options depending on the number of interface boards (IO), the dual payload provides additional room for custom devices with a size of 225.6 x 207 x 107.5 mm.
Customization Features: Users can further customize the payload plate using the provided CAD files, allowing specific designs to accommodate custom equipment. The provided plates come pre-fitted with mounting holes, making modifications easier.
The following PDF contains all the necessary information for integrating custom payloads into your DeltaQuad Evo. Click to download.
When the map is selected in the Fly View the camera's Field of View is indicated by a cone.


